пятница, 23 апреля 2021 г.

thumbnail

Coconut Dream Bars

Update: The auction is over and we raised almost $4000! Thank you to all who participated!


Want to try these bars without making them yourself? I donated 2 dozen to an online bake sale to help Japan with earthquake and tsunami relief. There are lots of baked goods available as well as restaurant gift certificates in the Sacramento area. Check out the listings here and go bid on April 1-2!


Dream bars stacked

When Girl Scout cookie season began, the familiar order form went up in the office at my school. For the last couple of years, I’ve been meaning to make a homemade version of some kind of Girl Scout cookie – maybe my favorite, Thin Mints, or another classic, Samoas (AKA Caramel DeLites). Instead, fate intervened: my dear coworker and friend, who was having a very stressful month, mentioned a dessert bar from a local cafe that was like Samoas, but even better. “They had chunks of chocolate, much more than on the cookies,” she said dreamily, ” but ever since the owners changed, I haven’t seen the bars.”

Dream bars 6

Instead, she resigned herself to a box of Samoas once a year. She told me the name of the amazing bars: dream bars (which seemed quite apropro). I’d never heard of them, but made a mental note to look them up later. Once I Googled “dream bars” I was met with something from my childhood: magic layer bars (AKA 7 layer bars). While my dad was the chocolate chip cookie baker, my mom made magic layer bars. They were a simple recipe from the sweetened condensed milk can: a graham cracker crust topped with sweetened condensed milk, coconut and chocolate chips.


Dream bar close up

I found many variations on dream bars and magic layer bars, but decided to stray from my childhood memories in favor of what seemed like a more classic dream bar recipe. I wanted to surprise the recipient so I didn’t risk asking her more about the bars but hoped that they would be want she wanted…
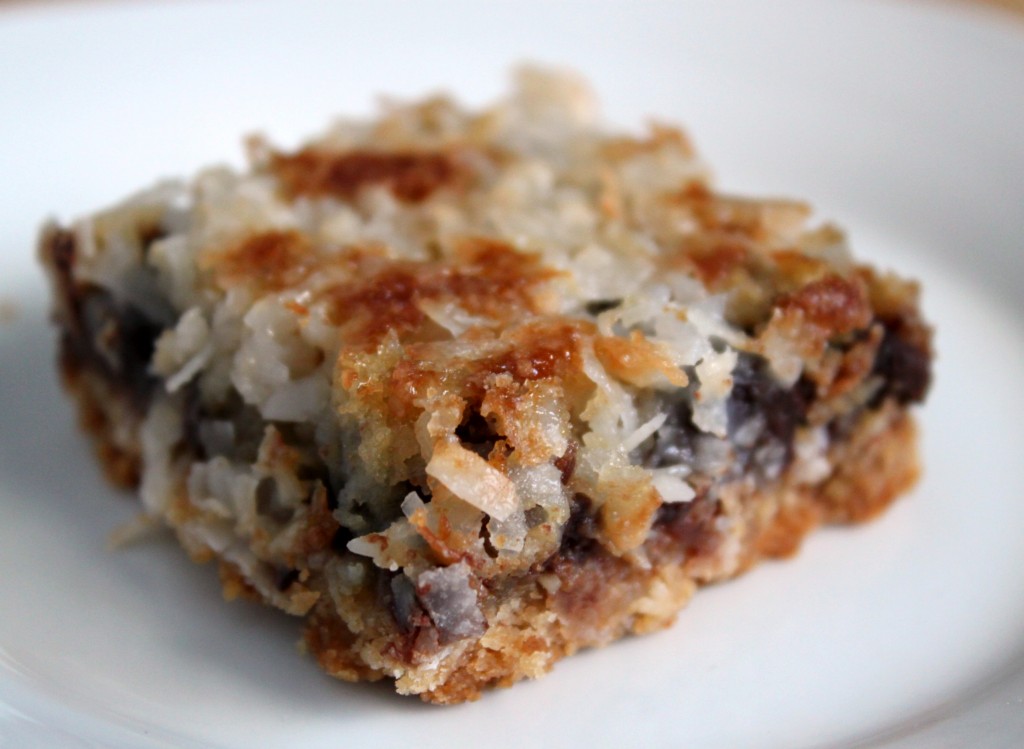

Dream bar

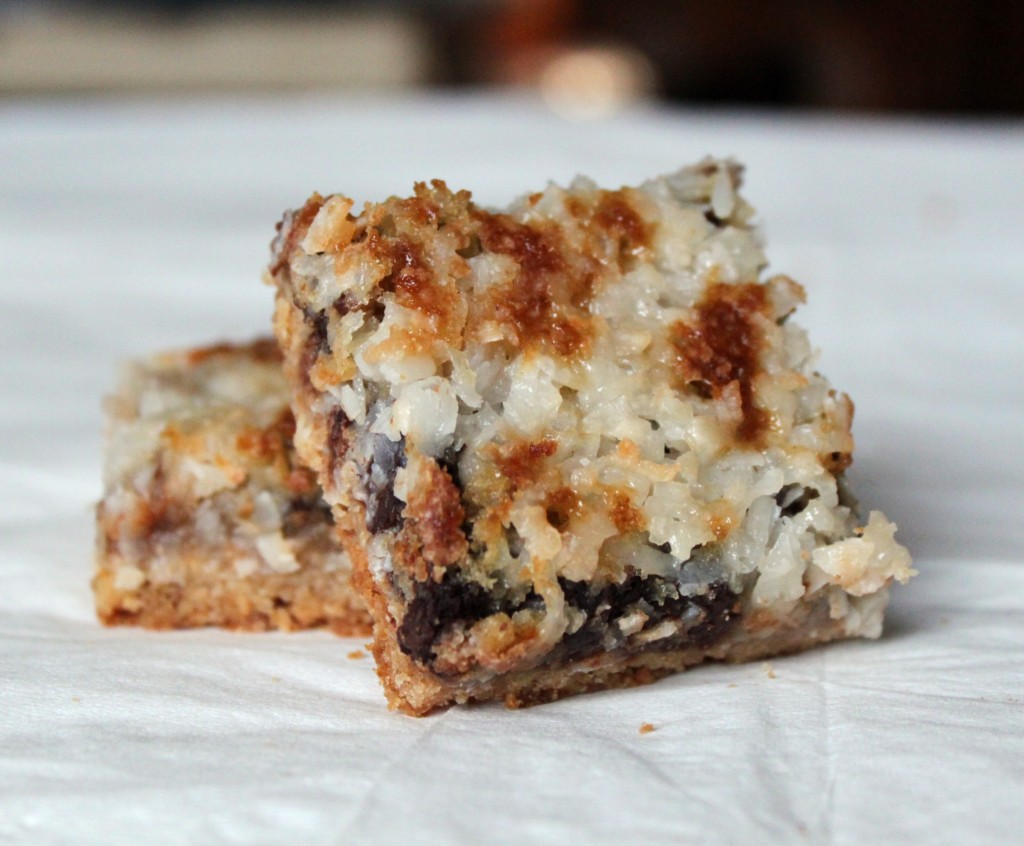
And I don’t think she was disappointed. The shortbread crust was richer than the graham cracker crust I remembered. Topping that with a gooey layer of coconut cream, coconut and a sweet filling with chocolate and pecans made these bars irresistible. Forget potato chips – I literally could not eat just one in a sitting. I ended up giving as many as I could away, after making a small dent in the pile. These are dangerous, but so worth it! I won’t make them often, and will make sure I have many people to share with, but they are fantastic dessert bars. If you like coconut even a little, you have to try these!


Recipe:


Coconut Dream Bars


Adapted from America’s Test Kitchen


Makes 24 bars


For the crust:


  • 2 C unbleached all-purpose flour
  • 3/4 C packed dark brown sugar
  • 1/2 C pecans
  • 1/4 t salt
  • 10 T unsalted butter, cut into 1/2-inch pieces and chilled

For the filling:


  • 1 1/2 C sweetened shredded coconut
  • 1 C cream of coconut (you can find this in the baking aisle)
  • 2 large eggs
  • 3/4 C packed dark brown sugar
  • 2 T unbleached all-purpose flour
  • 1 1/2 t baking powder
  • 1 t vanilla extract
  • 1/2 t salt
  • 1/2 C pecans, toasted and roughly chopped
  • 1/2 C chocolate chips

To make the crust:


Preheat the oven to 350°F and place rack in middle of ove. Line a 13″x9″ baking pan with foil and lightly coat with nonstick spray.


In a food processor, process the flour, sugar, pecan and salt for about 10 seconds, until the pecans are coarsely ground. Add the butter and pulse around 10 seconds, until the mixture looks like coarse meal. Press the mixture into the baking pan, pressing it down firmly with the flat bottom of a glass. Bake for 20 minutes, or until crust is golden brown. Cool for 20 minutes before adding the filling.


To make the filling:


Combine coconut and cream of coconut in a medium bowl. In a separate bowl, whisk together the eggs, sugar, flour, baking powder, vanilla and salt until smooth, then stir in the pecans and chocolate chips. Spread the filling over the cooled crust, then dollop heaping spoonfuls of the coconut mixture over the filling. Spread into an even layer, but don’t worry if appears patchy.


Bake in the preheated oven until topping is a deep golden brown (around 30-40 minutes). Let cool completely, then lift bars out of pan using the foil and cut into 24 pieces. The bars can be refrigerated in an air-tight container for up to 5 days.


More recipes you’ll love:


thumbnail

Classic Tiramisù

Classic Tiramisù
Classic Tiramisù

Done correctly, a classic tiramisù can be transcendent. A creamy dessert of espresso-soaked ladyfingers surrounded by lightly sweetened whipped cream and a rich mascarpone, tiramisù relies heavily on the quality of its ingredients. If you don’t have a barista setup at home, pick up the espresso at a local coffee shop, or use strongly brewed coffee. As for the ladyfingers, make your own or buy them, but keep in mind that store-bought varieties can range from soft and spongy (like angel food cake) to hard and crunchy (like biscotti). Both kinds will work here, but if you're using the softer variety, stick to a light brushing of espresso, instead of a deep dip.


Preparation


  1. Using an electric mixer in a medium bowl, whip together egg yolks and 1/4 cup/50 grams sugar until very pale yellow and about tripled in volume. A slight ribbon should fall from the beaters (or whisk attachment) when lifted from the bowl. Transfer mixture to a large bowl, wiping out the medium bowl used to whip the yolks and set aside.
  2. In the medium bowl, whip cream and remaining 1/4 cup/50 grams sugar until it creates soft-medium peaks. Add mascarpone and continue to whip until it creates a soft, spreadable mixture with medium peaks. Gently fold the mascarpone mixture into the sweetened egg yolks until combined.
  3. Combine espresso and rum in a shallow bowl and set aside.
  4. Using a sifter, dust the bottom of a 2-quart baking dish (an 8x8-inch dish, or a 9-inch round cake pan would also work here) with 1 tablespoon cocoa powder.
  5. Working one at a time, quickly dip each ladyfinger into the espresso mixture -- they are quite porous and will fall apart if left in the liquid too long -- and place them rounded side up at the bottom of the baking dish. Repeat, using half the ladyfingers, until you’ve got an even layer, breaking the ladyfingers in half as needed to fill in any obvious gaps (a little space in between is O.K.). Spread half the mascarpone mixture onto the ladyfingers in one even layer. Repeat with remaining espresso-dipped ladyfingers and mascarpone mixture.
  6. Dust top layer with remaining tablespoon of cocoa powder. Top with shaved or finely grated chocolate, if desired.
  7. Cover with plastic wrap and let chill in the refrigerator for at least 4 hours (if you can wait 24 hours, all the better) before slicing or scooping to serve.

четверг, 22 апреля 2021 г.

thumbnail

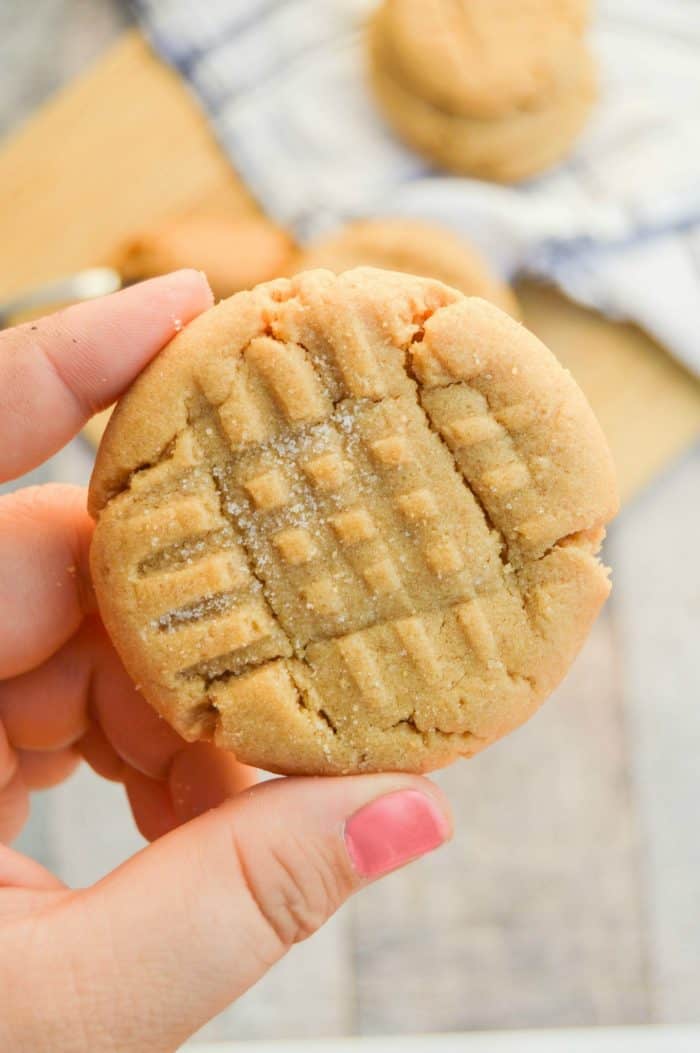
Classic Peanut Butter Cookie

Nothing better than a dessert with peanut butter. These Classic Peanut Butter Cookies are easy to make so taste so good! Simple yet so satisfying, you will be really happy with these cookies once you make them!


Why I love Peanut Butter Cookies:


Classic Peanut Butter Cookie in hand

How to make Classic Peanut Butter Cookies:


Step One: Preheat your oven and prepare a baking sheet.


Step Two: In a large stand mixer or with an electric hand mixer cream together your wet ingredients.


Step Three: Next add in egg and vanilla extract and continue to mix.


Step Four: Meanwhile in a separate bowl sift together all of your dry ingredients. Then slowing add into your wet batter.


Step Five: Roll your dough into 1 inch balls.


Step Six: Place on a baking sheet and use a fork to make a criss-cross pattern. Sprinkle cookies with remaining sugar.


Step Seven: Bake for 10 minutes or until cookies just start to look brown.


Cooking Tips:


  • Why flatten cookie: peanut butter cookies don’t spread when baking as other cookies would. To make sure they bake well you want to press the cookies down. I used a fork to make the traditional marks on the peanut butter cookies.
  • How to make the peanut butter crisscross: it’s actually pretty simple. I just pressed down with a fork and then changed the direction of my fork and pressed again. That’s it!

Here are a few more of my favorite cookie recipes:


Chocolate Chocolate Chip Cookie: This cookie is the ultimate. I mean when chocolate is in the title twice you know it’s going to be good.


If you tried this recipe or any of my recipes I would love to hear from you, leave me a comment below. You can also connect with me on FACEBOOK, INSTAGRAM, PINTEREST, and YOUTUBE.


I would love for you to follow along and discover more amazing recipes.


Show me what you are making, tag us or use hashtag #TDOARH


среда, 21 апреля 2021 г.

thumbnail

Cinnamon Bun Pecan Pie Recipe

Please Share...00


Pie season is here–are you ready?


Cinnamon Bun Pecan Pie Recipe

Instead of making the same old pumpkin or pecan pie this year, shake things up a little and try this twist on classic pecan pie! This Cinnamon Bun Pecan Pie has all the best elements of cinnamon buns in pie form: a swirled cinnamon crust, a sweet, gooey filling with plenty of cinnamon and crunchy pecans, and a generous dollop of a tangy cream cheese topping.


Cinnamon Bun Pecan Pie

Because time is at a premium around the holidays, this recipe takes some shortcuts and calls for premade pie dough and frosting. If you have extra time, though, feel free to make your own dough and frosting–it will only make the pie better!


Cinnamon Bun Pecan Pie

Cinnamon Bun Pecan Pie


Ingredients


  • Pie dough: enough for 1 9-inch crust
  • 2 ounces (4 tbsp) melted butter
  • 4 tsp ground cinnamon, divided use
  • 3/4 cup dark corn syrup
  • 1/2 cup packed light brown sugar
  • 3 large eggs, at room temperature
  • 1 tsp vanilla extract
  • 1 tsp cake and cookie flavoring (optional)
  • 1/2 tsp salt
  • 2 cups toasted pecan halves
  • 1 cup cream cheese frosting (not “whipped” variety)

cinnamon-bun-pecan-pie-recipe-2.jpg

Start with dough that is slightly chilled but still pliable. Roll out the dough on a lightly floured piece of parchment or waxed paper until it’s a little less than 1/4-inch thick.


cinnamon-bun-pecan-pie-recipe-3.jpg

Brush 1 tablespoon of the butter on top of the crust–this is just a thin layer of butter for the cinnamon to stick to. Leave the rest of the melted butter to put in the filling.


cinnamon-bun-pecan-pie-recipe-4.jpg

Sprinkle 2 teaspoons of the cinnamon on top of the crust, and spread it around with your hands. It would be really delicious if we could use cinnamon sugar, but the sugar would leak out and make a mess, and would probably glue the pie to the tin…so just plain cinnamon it is.


cinnamon-bun-pecan-pie-recipe-5.jpg

Use the edge of the parchment or waxed paper to start rolling the dough over onto itself. Roll it up into a tight spiral.


cinnamon-bun-pecan-pie-recipe-7.jpg

Use a sharp serrated knife to cut the spiral log into rounds, about 1/2-inch thick. If your dough has become too soft to cut cleanly, or is getting smashed down during the process, refrigerate or freeze it briefly until it is firm enough to cut.


cinnamon-bun-pecan-pie-recipe-8.jpg

Spray a 9-inch pie tin with nonstick cooking spray, or rub it liberally with butter. Start placing the cinnamon swirl pie pieces in the pan so that they are touching each other. No need to be too precise or worry about a pattern or anything like that!


cinnamon-bun-pecan-pie-recipe-9.jpg

When you’ve put over half of the pieces in the pie tin, begin to flatten them with your fingers, pressing them down so that they expand and fill all of the gaps. You shouldn’t see any empty space between the pieces! Try to get them all about the same depth.

Once you’ve started the process of pressing them together, you can see where you have gaps in the crust, or areas at the top that need to be filled in. So add the remaining pie rounds, and press everything together until you have a solid crust in an even thickness.


cinnamon-bun-pecan-pie-recipe-10.jpg

The top will be a little raggedy, so use a sharp paring knife to trim the edges so that they are smooth and even all the way around.

Once the crust is made, place it in the refrigerator to chill while you mix up the filling, and preheat the oven to 375 Fahrenheit.


cinnamon-bun-pecan-pie-recipe-11.jpg

This filling is so easy and fast to make! All you need is one bowl and a whisk. In a large bowl, combine the corn syrup and the brown sugar. Whisk them together until there are no lumps of sugar. The mixture will be thick and sticky.


cinnamon-bun-pecan-pie-recipe-12.jpg

Add the remaining 3 tablespoons of melted butter and whisk it in. Much like your relatives after a nice turkey dinner, the mixture will loosen up a little bit.


cinnamon-bun-pecan-pie-recipe-13.jpg

Add the eggs one at a time, whisking well after each addition, until you can’t see any streaks of egg remaining.


cinnamon-bun-pecan-pie-recipe-14.jpg

Finally, add all the flavorings: the vanilla, the salt, the remaining 2 teaspoons of cinnamon, and the cake and cooking flavoring, if you’re using it. Whisk everything well until it’s entirely blended.


cinnamon-bun-pecan-pie-recipe-15.jpg

Just a quick note about the cake and cooking flavoring: this is a little trick to getting that signature “cookie” or “dough” taste! It’s often used in commercial kitchens, so you will probably recognize the flavor even if you think you’ve never tasted it before. I use it in this pie to reinforce the flavors of cinnamon buns–it just adds a special something that reminds me of warm rolls. However, it is completely optional, and you won’t be missing anything if you decide to skip it. If you are interested in finding it, it’s often found in well-stocked cake or culinary supply stores, or it’s readily available on the internet.


cinnamon-bun-pecan-pie-recipe-16.jpg

Once all of the filling ingredients are mixed together, place the toasted pecans in the bottom of the pie shell, then carefully pour the liquid filling on top.

Put the pie on a baking sheet lined with parchment or foil, to prevent any oven nastiness should it accidentally spill over. Bake the pie in the 375 F oven for 15 minutes.


cinnamon-bun-pecan-pie-recipe-17.jpg

After 15 minutes, remove the pie from the oven.The crust should have some color and look cooked by now, although the center of the pie will be completely raw. The problem is that the crust has a tendency to burn before the filling is cooked through, so the solution is to cover it with foil to prevent burning. Tear off strips of aluminum foil and crimp them along the edges, covering the crust. The center of the pie should remain exposed, so it will cook properly.

Reduce the oven’s temperature to 350 F and return the pie to the oven to continue cooking. Cook the pie for an additional 20-25 minutes.


cinnamon-bun-pecan-pie-recipe-18.jpg

When it is finished, the center of the pie should be puffed and have slight cracks in the surface. When you lightly tap the pie tin, the center should remain steady instead of jiggling. Let the pie cool completely on a wire rack at room temperature.


cinnamon-bun-pecan-pie-recipe-19.jpg

Once cool, it’s time to frost this bad boy! Remove the lid from the frosting, and microwave it for 20-30 seconds, then stir well. You want to make the frosting runny enough to pour easily from a spoon. If you’re using homemade frosting, thin it out with milk to a consistency that will hold its shape but will drizzle easily.


cinnamon-bun-pecan-pie-recipe-20.jpg

The way you decorate your pie is up to you. I like a casual look, so I drizzled diagonal lines across the top using a spoon–I wanted it to look random instead of overly polished. You could also place the frosting in a piping bag to drizzle it more precisely. Another idea is to omit this step, and instead drizzle frosting on the pieces once they have been cut and plated. All that matters is that your Cinnamon Bun Pecan Pie ends up with a bit of frosting on top!


cinnamon-bun-pecan-pie-recipe-24.jpg

This pie is sure to be a hit at your Thanksgiving table. It’s close enough to the classic recipe to please purists, but the fun crust, gooey cinnamon filling, and cream cheese topping will entice those who like to experiment a bit more with their food. The crust is most obvious when the filling is scraped out, or when looking at the back of a slice, like so:


Cinnamon Bun Pecan Pie

This crust technique is a fun way to dress up your dough, and can be used with just about any pie.

You can store Cinnamon Bun Pecan Pie well-wrapped in the refrigerator, but chances are you won’t have an left after the big day. Who could say no to two great tastes in one dessert?


Cinnamon Bun Pecan Pie

While enjoying the Cinnamon Bun Pecan Pie, take a moment to check out our Hanukkah Gifts and Christmas nut gifts.

Enjoy!


Please Share...00


thumbnail

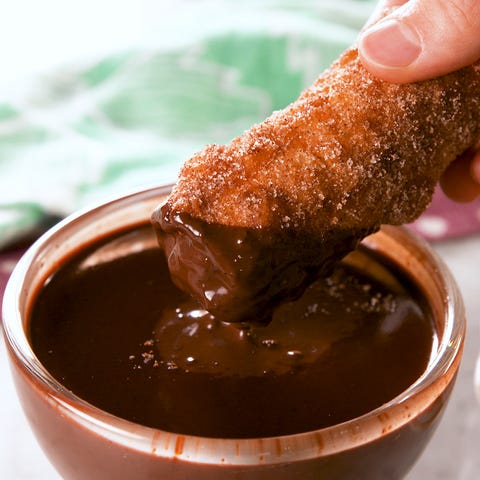
Churro Cheesecake Egg Rolls

If you're a fan of churros and cheesecake, this dessert was made for you. Ready in just 30 minutes and using a fraction of the normal amount of frying oil you'd need to cook churros, this treat is simple to make and perfect for sharing. Roll them in the cinnamon sugar as soon as they leave the oil to ensure maximum coverage, and eat 'em while they're fresh! The pinch of cayenne in the chocolate sauce—for a little extra kick in each bite—is totally optional, but highly recommended.


Addicted to egg rolls? We've got sweet caramel apple ones and savory burrito ones, and so many more for the next time you're hungering for them. If you've made this recipe, don't forget to rate and leave us a comment below on how you liked it! As always, thanks for cooking with us.


  1. In a large bowl, beat cream cheese, sugar, cinnamon, and salt until smooth. Beat in vanilla until fully combined.
  2. Place an egg roll wrapper on a clean surface in a diamond shape and brush top 2 edges lightly with water. Spoon about 3 tablespoons cream cheese mixture into a line in the center. Roll up bottom half, tightly fold in sides, and gently roll upward to seal. Repeat with remaining wrappers and filling.
  3. In a shallow bowl, mix together sugar and cinnamon. In a large skillet over medium heat, pour enough oil to reach 1" up the side of skillet. Heat until oil starts to bubble when a drop of water is added.
  4. Add egg rolls and fry until golden, a little over 1 minute per side. Transfer to bowl with cinnamon sugar and roll to coat each egg roll.
  5. For serving: In a medium microwave-safe bowl, microwave cream in 30-second intervals until it starts to bubble, watching carefully to avoid boiling over. Pour hot cream over chocolate and let sit 3 minutes. Add salt and cayenne, if using, and whisk until smooth.
  6. Serve egg rolls with warm chocolate dipping sauce.

Churro Cheesecake Egg Rolls - Delish.com

This content is imported from {embed-name}. You may be able to find the same content in another format, or you may be able to find more information, at their web site.


This content is created and maintained by a third party, and imported onto this page to help users provide their email addresses. You may be able to find more information about this and similar content at piano.io


thumbnail

Chocolate Pom Poms

This is the healthy dessert you need right now.


  1. Line a mini muffin tin with liners. In each cup, add 2 teaspoons melted chocolate. Sprinkle pomegranate seeds on top and drizzle with more melted chocolate.
  2. Refrigerate until chocolate is firm, 20 minutes.
  3. Unwrap and serve.

This content is created and maintained by a third party, and imported onto this page to help users provide their email addresses. You may be able to find more information about this and similar content at piano.io


вторник, 13 апреля 2021 г.

thumbnail

Chocolate Crinkle Rolo Cookies

It doesn’t get much better than this! I certainly wouldn’t mind finding a gooey and warm Rolo hidden inside of a sugar coated chocolate cookie. Just leave it up to Megan from Pip & Ebby to think up this masterpiece! She has the most delectable dessert recipes on the planet! I’ve got to make these! Go check out the recipe and cookie instructions over at Pip & Ebby. Yum! Yum!


thumbnail

Chocolate Crack

Also known as chocolate, caramel, peanut butter, and potato chip fudge, this chocolate crack is sure to addict even the pickiest of critics. I’m really not sure how it’s even possible for this to not taste freakin’ awesome!? Just leave it up to Recipe Snobs to come up with this amazing dessert recipe. If you like to whip up really badass sweet treats, it’s the place to be!


Chocolate Crack | Recipe By Photo

thumbnail

Chocolate Covered Strawberry Pie

Super impressive looking and surprisingly easy to make, this is the perfect summertime dessert. No oven needed!


  1. Make crust: Grease a 9" springform pan with cooking spray. In a food processor, pulse cookies (with their filling) until they resemble fine crumbs, then add melted butter and salt and process until combined.
  2. Press mixture into bottom of pan and set aside.
  3. Place chocolate in a medium heatproof bowl. Bring cream just to a boil in a small saucepan over medium-high. Pour over chocolate; add a pinch of salt. Let stand 10 minutes, then stir until smooth and shiny.
  4. Meanwhile, hull 3 cups of the strawberries. Leave hull on remaining 1 cup of strawberries and halve them.
  5. Scrape the chocolate ganache mixture into springform. Press the hulled strawberries into the ganache and smooth the top over with a spatula. Refrigerate until set, at least 2 hours.
  6. Arrange the halved strawberries on top and serve.

Food, Strawberries, Cake, Dish, Strawberry, Chocolate cake, Dessert, Cuisine, Fruit cake, Sweetness,

This content is imported from {embed-name}. You may be able to find the same content in another format, or you may be able to find more information, at their web site.


This content is created and maintained by a third party, and imported onto this page to help users provide their email addresses. You may be able to find more information about this and similar content at piano.io


понедельник, 12 апреля 2021 г.

thumbnail

Chocolate Coconut Balls

Where are my almond joy fans out there? That’s one of my favorite chocolate bars ever, and although these chocolate coconut balls weren’t meant to recreate that recipe, they totally taste like it! If you have a sweet tooth while trying to maintain a healthy diet during the start of the year, these are a great way to satisfy that sweet tooth with wholesome vegan ingredients!


Close up to show inside of chocolate coconut balls

What do you need to make chocolate Coconut Balls?


Yes, you can totally just buy a healthy chocolate covered treat like this these days. But why not make it at home when you only need such minimal basic ingredients? You only need 6 ingredients to make these coconut bites. And I bet you already have most of them in your pantry:


  • Shredded coconut
  • Roasted or raw cashews
  • Any kind of chocolate you like
  • Maple syrup
  • Coconut oil
  • Vanilla extract

How do you make chocolate Coconut Balls?


Given there are only 6 ingredients to make this vegan dessert, and that it’s a no-bake recipe, you can probably guess that the instructions are super simple and straightforward. I would recommend however having a good food processor because it’s the most important part of the recipe.


To start, blend the cashews and coconut together.


When the mixture looks finely chopped, add the maple syrup, coconut oil and vanilla extract and blend again. Now the mixture is pretty much done and ready for shaping and chocolate dipping!


Then scoop up about 1-2 tablespoons of the mixture and squeeze it in your hand really tightly until it binds. You won’t be able to roll these up because of how flaky they are. But you can squeeze them and slowly shape them with your hands into round shapes. That’s all thanks to the coconut oil we used. They won’t be perfectly round or smooth, and that’s the whole point. Just picture how almond joy chocolate bar looks but in circular’ish form.


Melt the chocolate in a microwave-safe bowl and dip the coconut bites into the melted chocolate. You can use a fork or use your hands. It’s honestly easier with your hands but they will be a chocolate mess after. That shouldn’t too be a big problem though, right? ��


Lay them on a baking sheet lined with parchment paper or wax paper and pop them in the fridge to set.


When they’re ready, you’ll notice that the chocolate solidifies. And you’re ready to enjoy these little pieces of heaven.


These pop-em-in-your-mouth coconut bites are made with simple raw ingredients that come together in a sweet dessert that tastes like the Almond Joy or a Bounty bar! Better yet, every ingredient works for you and not against you. Yeah, you’re not going to find a dessert as jam packed with nutrients and flavor as these little guys.


If you’ve tried this healthy-ish feel good Chocolate Coconut Balls recipe or any other recipe on FeelGoodFoodie, then don’t forget to rate the recipe and leave me a comment below! I would love to hear about your experience making it. And if you snapped some shots of it, share it with me on Instagram so I can repost on my stories!


For more vegan desserts, check out:


I created this blog post first on March 23, 2017. I am updating it today to include improved new step-by-step images and a video tutorial! Here’s the old photo from Instagram posted on August 14, 2014 for kicks!


thumbnail

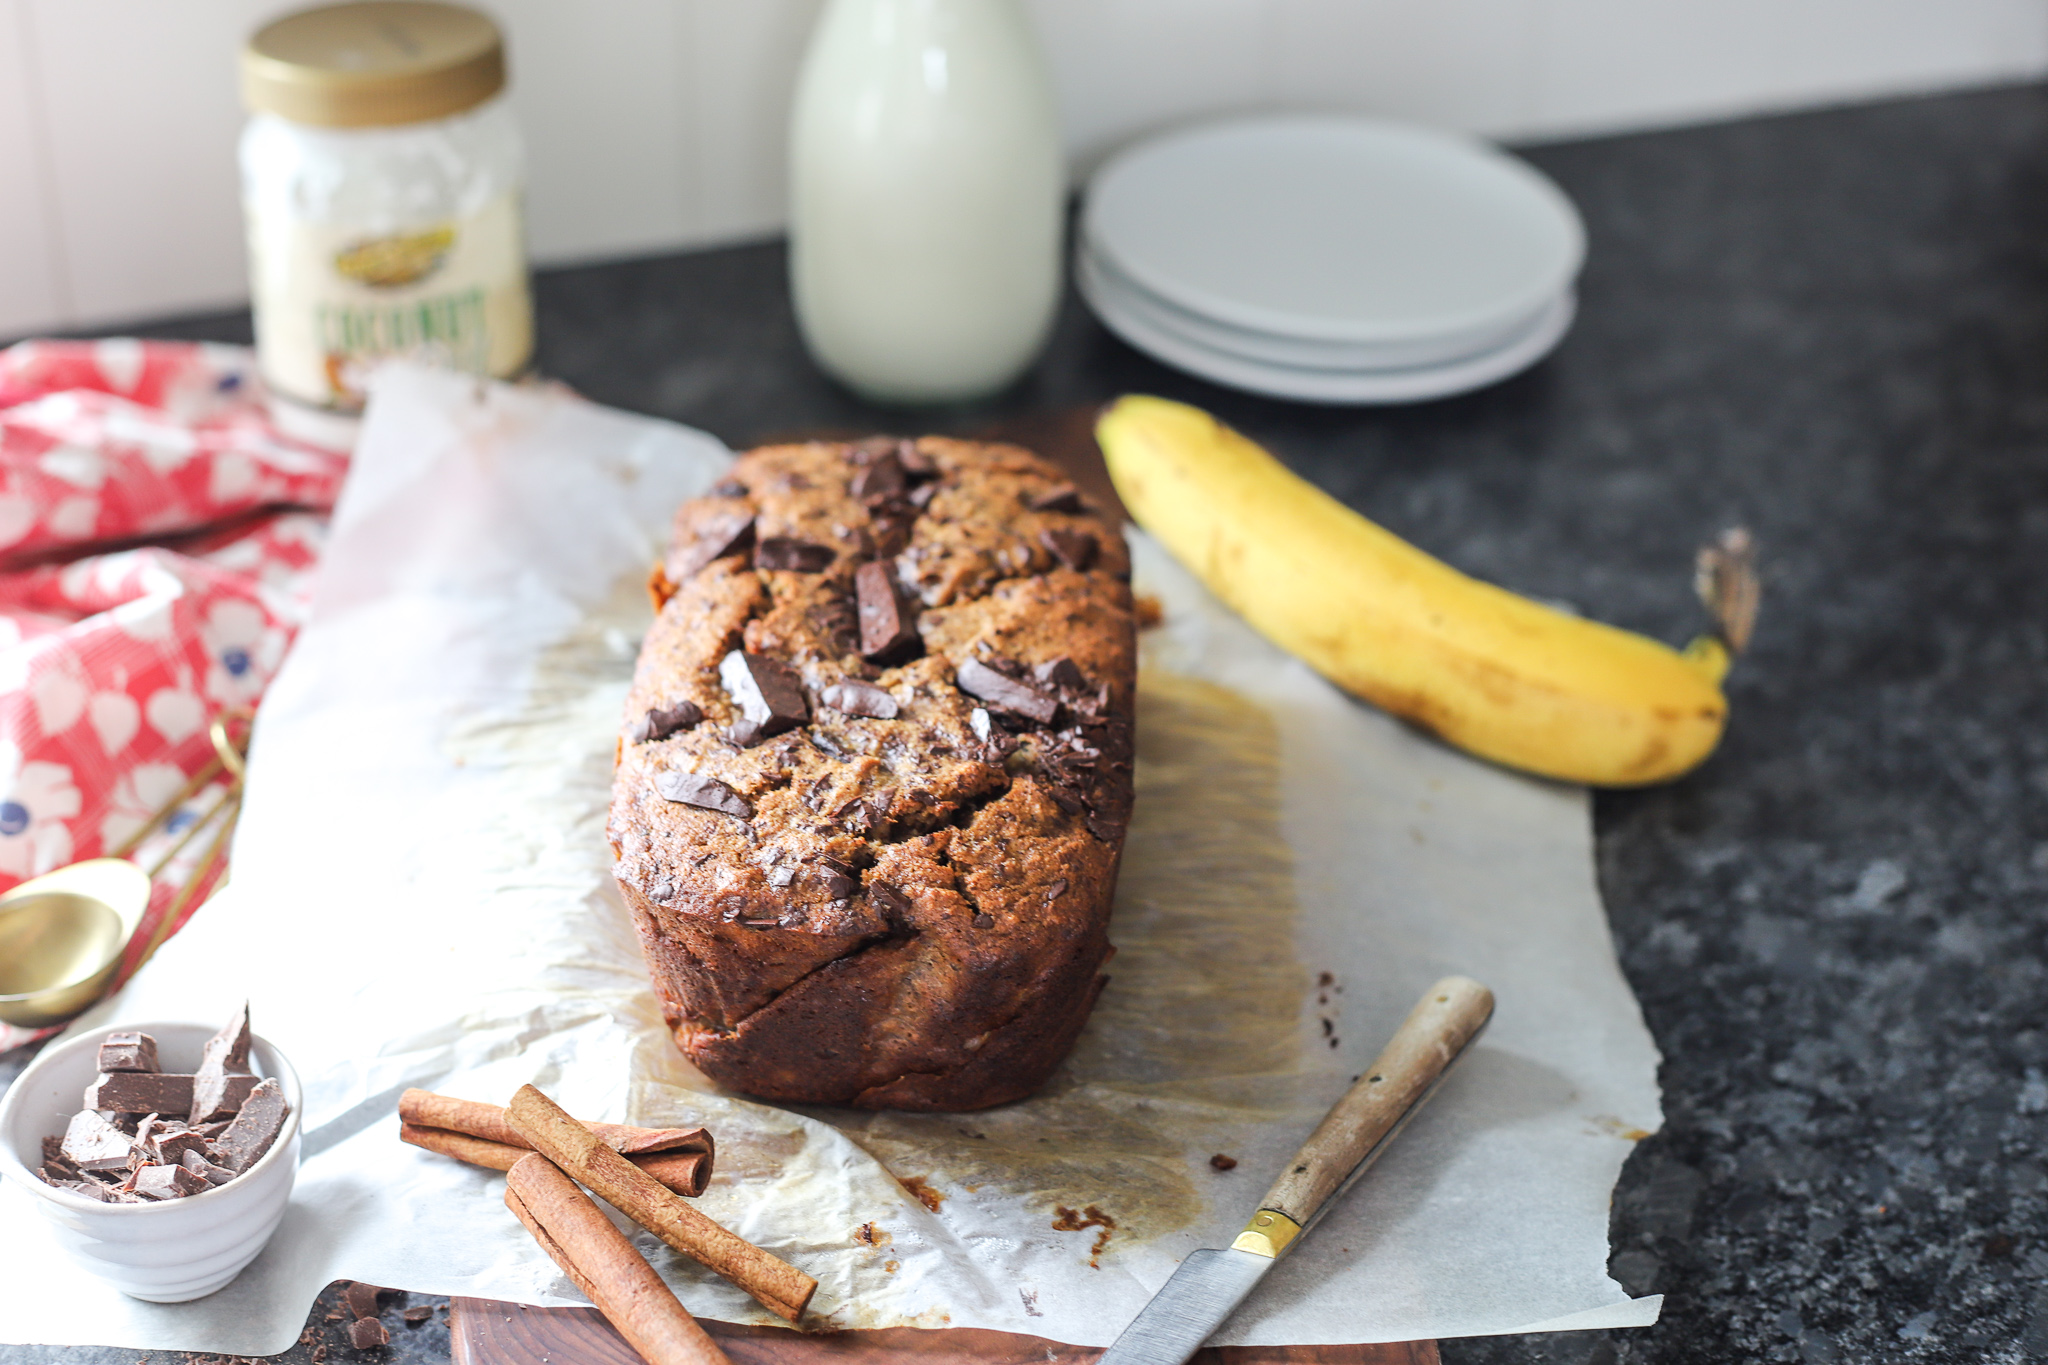
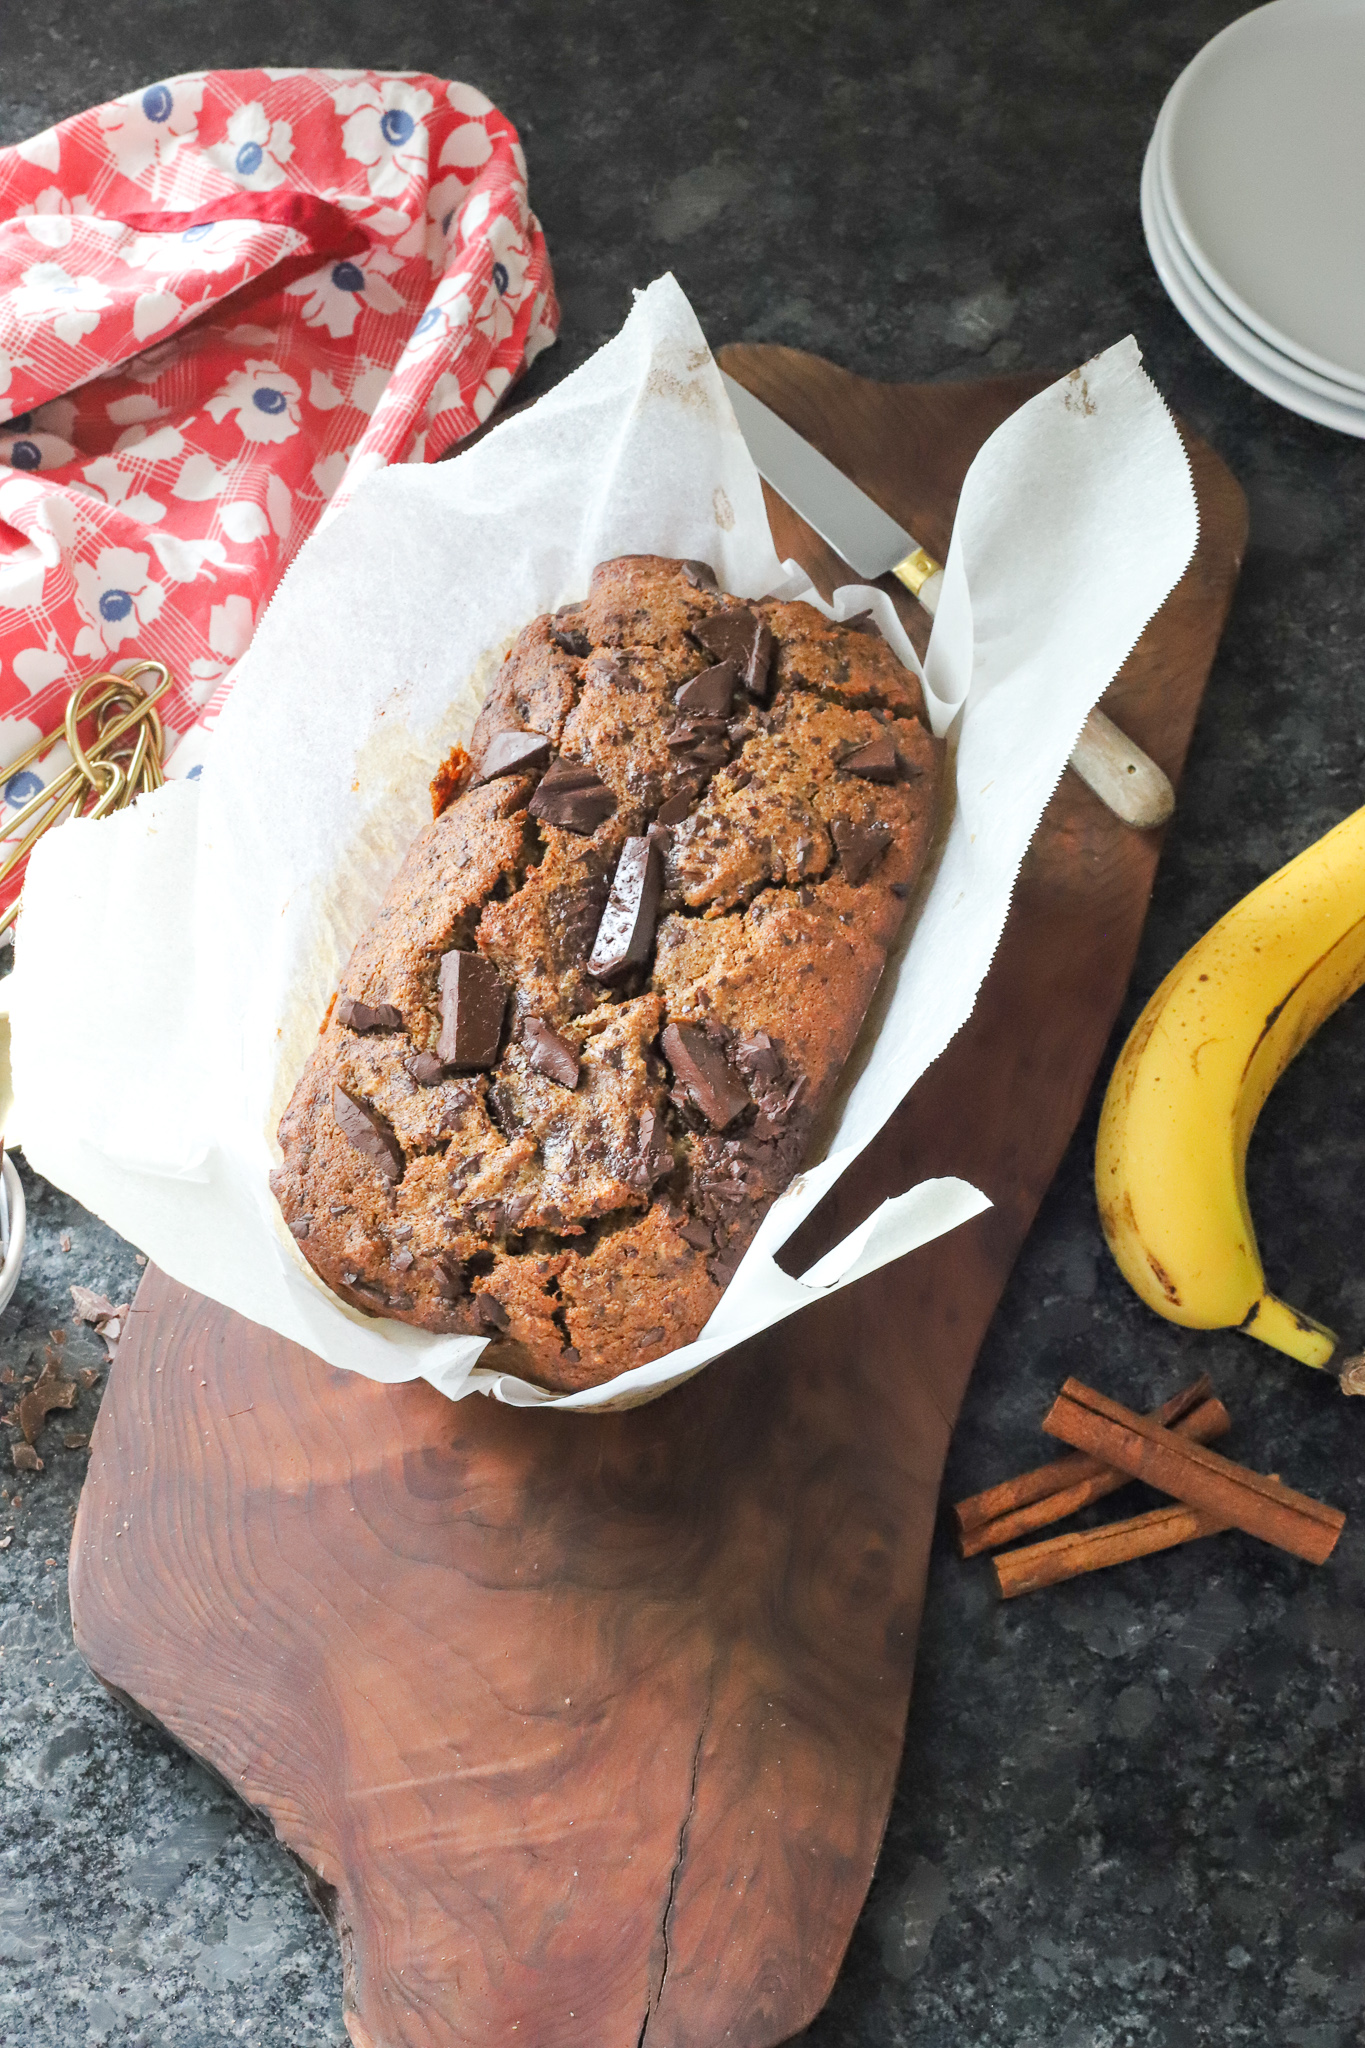
Chocolate Chunk Banana Bread

Banana bread…yum. What’s better than a warm slice right out of the oven? Only one thing–when that banana bread also has chunks of chocolate inside it. Double yum.


Chocolate Chunk Banana Bread

This chocolate chunk banana bread is super moist and full of both banana flavor and chocolate–a great combination if you ask me. I also added a little cinnamon in there to tie it all together. This is a recipe that’s easy enough for anyone to tackle. Just be sure to bake it long enough to enjoy. There’s nothing worse than bread that’s not baked through. Not speaking from experience or anything!


Chocolate Chunk Banana Bread

To make a nice moist bread, I used Golden Barrel Coconut Oil as well as a couple tablespoons of sour cream. If you don’t have sour cream, try substituting it with some yogurt. If you have no yogurt, don’t fret–it’ll turn out just fine without the extra “cream” in the batter, so just omit it entirely. That’s the beauty of baking–you can typically swap out ingredients for healthier alternatives or in some cases, leave out certain ingredients. This bread will be moist even without the sour cream. Speaking of swapping out ingredients, I used Paleo flour in this recipe, so feel free to use whatever flour you prefer, whether that’s all-purpose, whole wheat, or gluten-free.


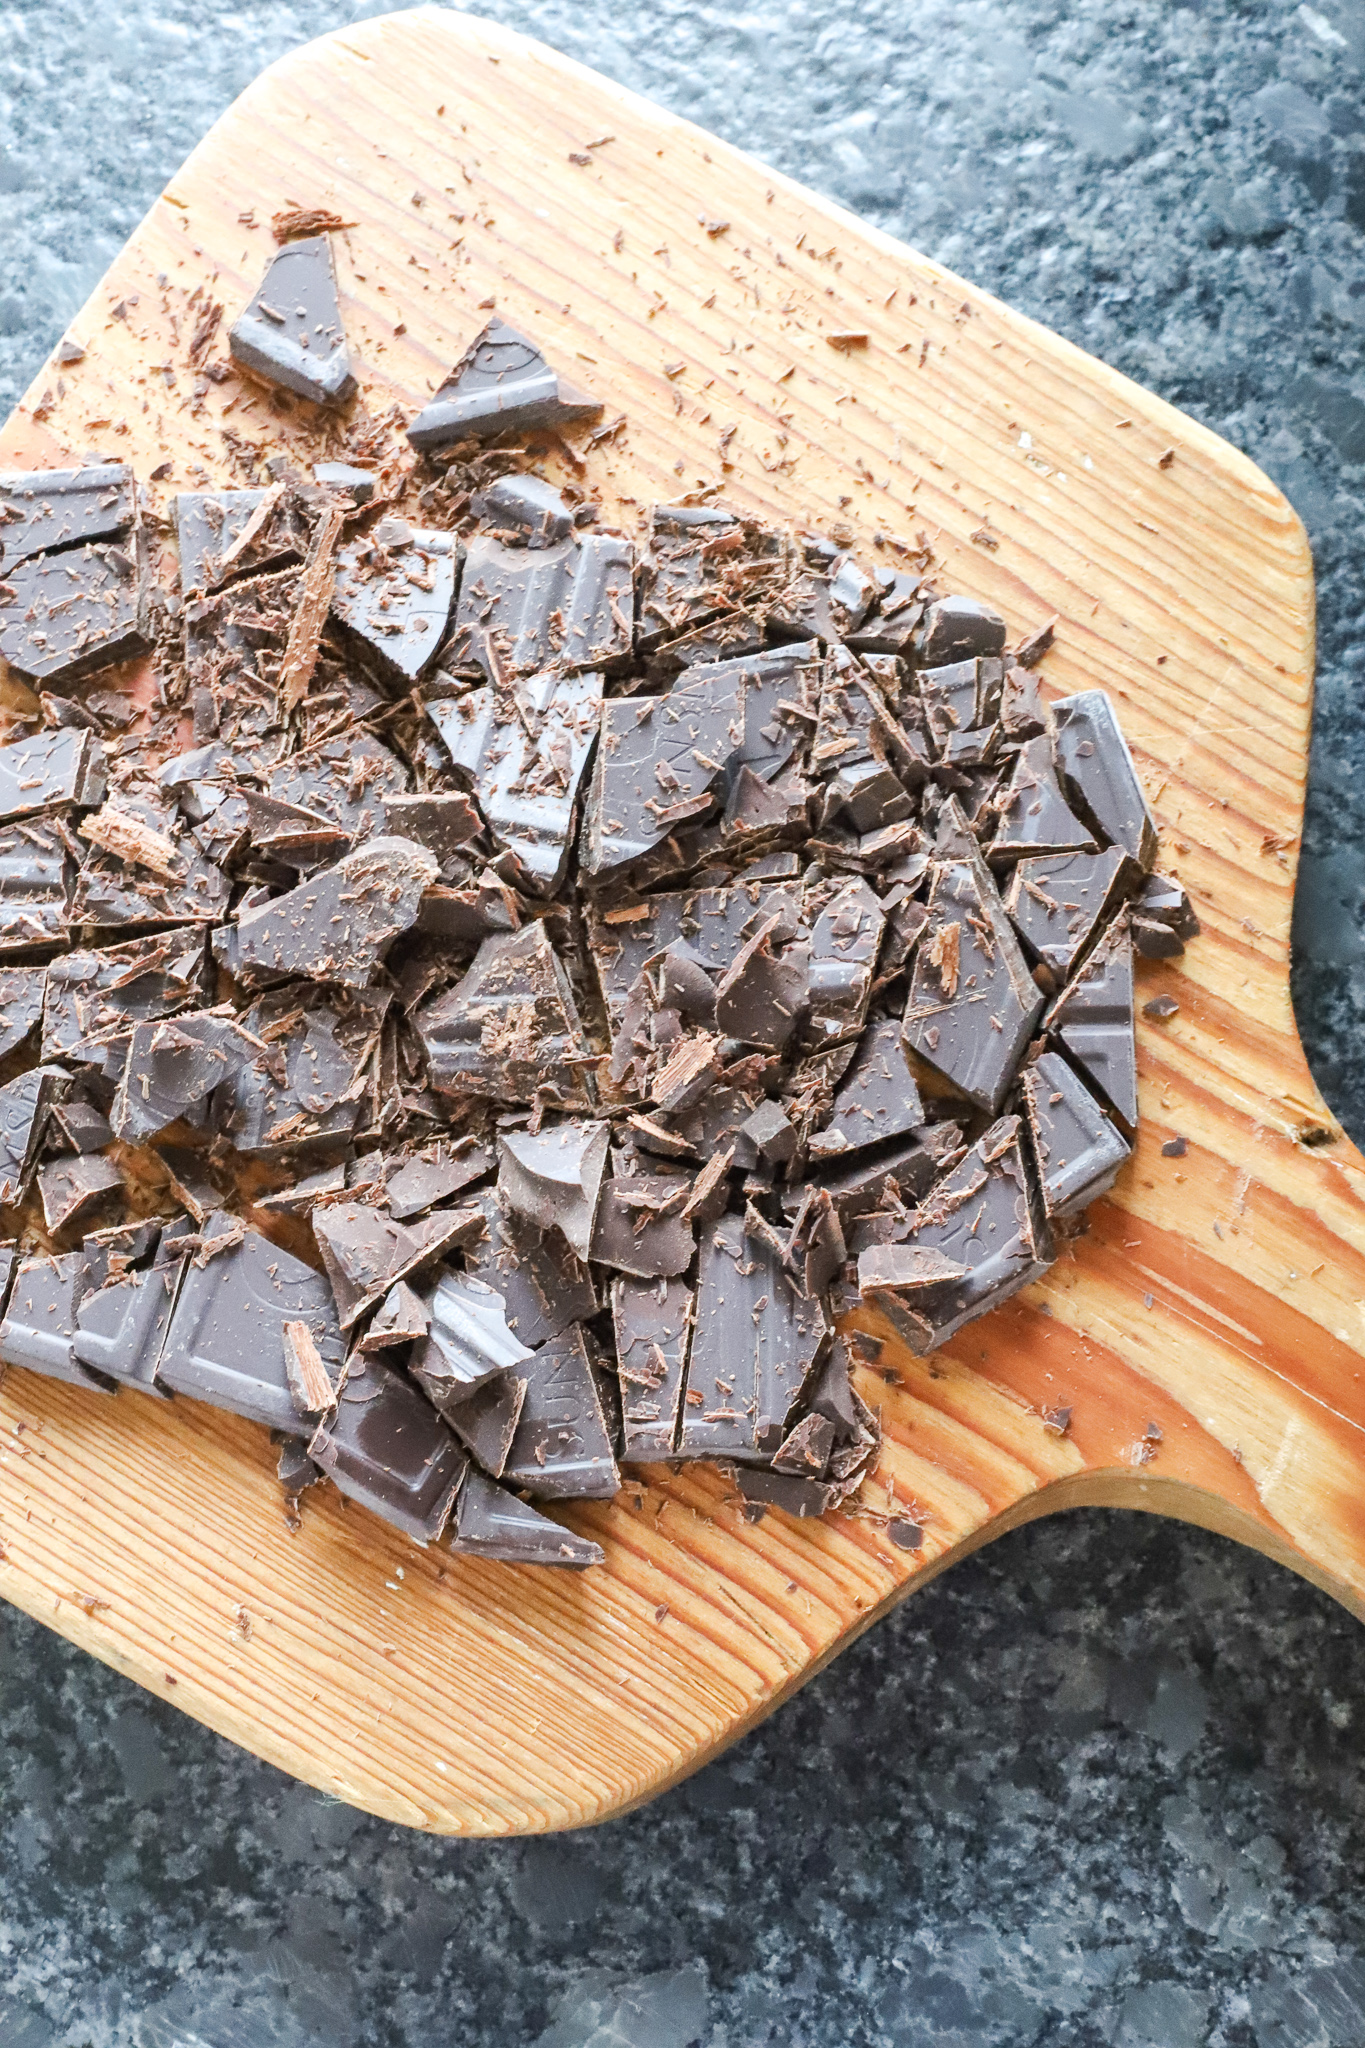
I decided to chop up some chocolate for this recipe. You may use whatever chocolate you have–chips, chunks, semi-sweet, or dark: make this bread how YOU like it!


Chopped Chocolate Chunks

Chocolate Chunk Banana Bread

Banana bread is a yummy quick breakfast or a great after-school snack. Our house is the bus stop for my boys as well as another neighbor family. The one morning, our little neighbor girl came down to our house without eating any breakfast. Her big brother said she didn’t have time, so feeling rushed, she came to our house flustered and upset. I sliced off a piece of this bread and she ate it before hopping on the bus. Banana bread to the rescue!


My guys loved having this after school. I like to give them something that will hold them off till dinner (man, can they eat!) and this bread did the trick.


So give this moist chocolate chunk banana bread a try this weekend! Any time of day you eat it–breakfast, dessert, or snack–you’re sure to love it. It just might be the best part of your weekend.


thumbnail

Chocolate Chip Pan Chewies


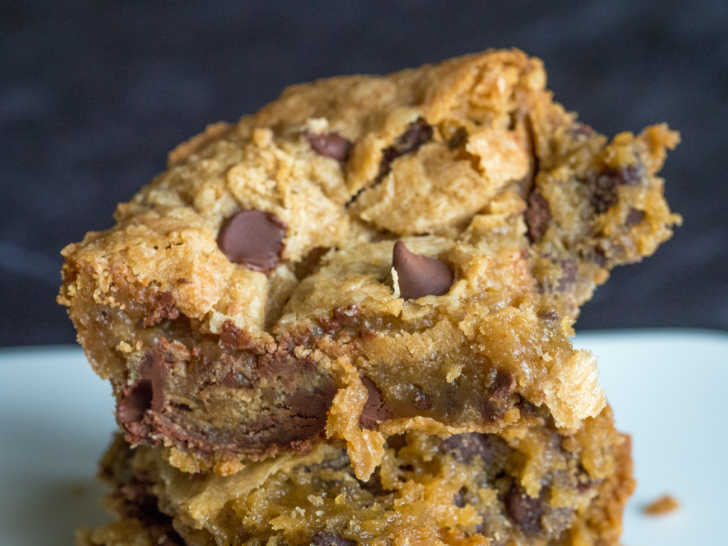
Recently, I sat down on the couch for family movie night and we all instantly agreed that something sweet was in order. I didn’t want to delay the movie by starting a lengthy cookie or cake project but I definitely agreed that we needed something sugary to snack on, so I did a quick search for something fast and sweet. And I found these. Somewhere between a chocolate chip cookie bar and a gooey blondie, these delicious Pan Chewies were in the oven before the opening credits were over, no pause button needed. They’re that easy. And oh my, are they good.


These take literally five minutes or less to mix up. You start with melted butter, brown sugar, vanilla, and one egg that you stir together before adding in some flour, baking soda, baking powder, and salt.


And then there are of course plenty of chocolate chips. It’s closer to the consistency of cake batter than cookie dough, so there’s no dough to scoop or divide – you just pour it into a baking pan and maybe smooth it out a bit with a spatula if you need to.


Twenty minutes or so in the oven and you’re ready to indulge. You can wait for them to set up a bit into something sliceable, but a big scoop of sweet gooeyness in a bowl is more my style.


With a little scoop of vanilla, these were heavenly right out of the oven. They’re so incredibly quick and easy to make, and their finished texture is fudgy and chewy and full of buttery flavor and melty chocolate. I’ll definitely be turning to these again and again when we need a quick-fix dessert!


вторник, 6 апреля 2021 г.

thumbnail

Cheesecake Banana Bread

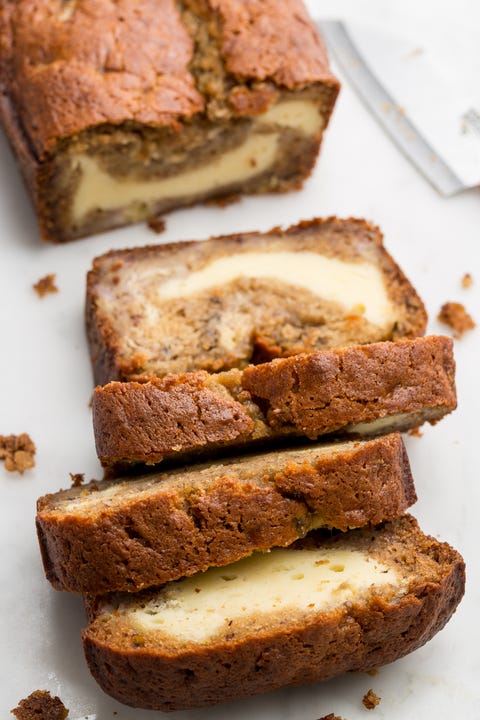
Sometimes the Delish team thinks up of combinations so sinful, so irresistible that we have to develop the recipe right there on the spot. There is no better example that our Cheesecake-Stuffed Banana Bread. Combined we've made dozens of both cheesecake and banana bread recipes and eventually we realized, why not bring the two, together! This recipe gives you the rich, tangy creaminess of cheesecake matched with the bright, fruity flavors of banana bread all in one delectable loaf. If you're looking for more twists on the classic banana bread, try our Birthday Cake and S'mores versions.


Tried making this amazing combo dessert? Let us know how it went in the comments below!


  1. Preheat oven to 350° and butter and flour a 9"-x-5" loaf pan. In a large bowl, whisk together 1 cup flour, baking soda, and salt.
  2. In another large bowl, combine 3/4 cup sugar, melted butter, buttermilk, vanilla, 1 egg and egg yolk and mix until smooth. Pour wet ingredients over dry and stir until combined, then fold in mashed bananas.
  3. Make cream cheese filling: In a small bowl, stir together remaining egg, cream cheese, and remaining 2 tablespoons each flour and sugar.
  4. Transfer half the batter to prepared pan. Dollop cream cheese filling on top and smooth in an even layer with a spatula. Top with remaining batter.
  5. Bake until deeply golden and a toothpick comes out clean, 1 hour. Let cool at least 10 minutes before slicing and serving.

cheesecake-stuffed-banana-bread

This content is imported from {embed-name}. You may be able to find the same content in another format, or you may be able to find more information, at their web site.


This content is created and maintained by a third party, and imported onto this page to help users provide their email addresses. You may be able to find more information about this and similar content at piano.io


About

Поиск по этому блогу

Технологии Blogger.