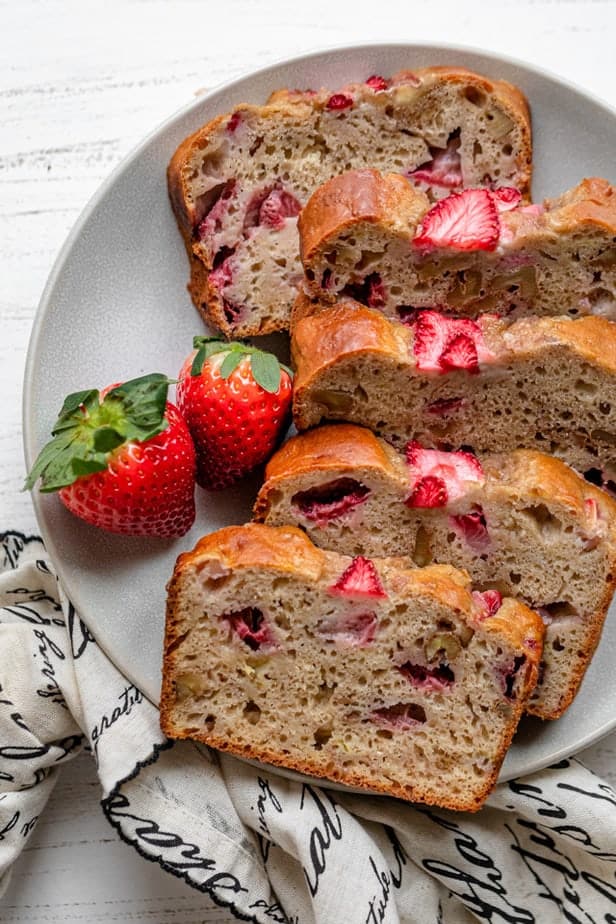
This Strawberry Banana Bread is a great quick bread recipe made without any oil or butter and a moderate amount of sugar. It’s like your favorite moist, rich banana bread, but low in fat and loaded with fresh strawberries! I make it using greek yogurt instead of oil, so it gives the bread moisture without the saturated fat.

If you’re in the mood for a little twist on banana bread, this strawberry banana bread is a great one to try! It’s very quick to put together, easy to prepare by hand without needing any mixer, and makes for a great treat that’s only about 125 calories per slice!
How to make strawberry banana bread
Mix the dry ingredients together: Flour, cinnamon, baking powder, baking soda and salt.
Mix the wet ingredients together: eggs, sugar, Greek yogurt and mashed bananas. You can substitute the Greek yogurt for oil or for sour cream. You can also reduce the sugar to 1/4 cup or omit it all together.
Now the process for this strawberry banana bread is similar to all quick bread recipes.
- Transfer the dry ingredients on top of the wet ingredients.
- Mix the ingredients together until well blended, but be careful not to over-mix.
- Add the chopped strawberries and walnuts on top. It helps if you can toss the strawberries in flour to avoid them sinking to the bottom of the batter, but it’s not necessary.
- Fold the strawberries and walnuts into the battery gently and transfer it to a greased loaf pan or one lined with parchment paper. Then bake in the preheated oven for about one hour.
You’ll know it’s done baking when the banana bread starts to pull away from the loaf pan and the top is golden brown. The ultimate test is to stick a toothpick in the center of the bread to see if it comes out clean. Allow the bread to rest for at least 10 minutes before removing it from the loaf pan. Then slice it up and enjoy!
Tips for making strawberry banana bread
- Use frozen strawberries if you don’t have fresh ones. Make sure to thaw them beforehand. Also, you will need to compensate for the added moisture from frozen strawberries by adding 1-2 extra tablespoons of flour.
- Toss the strawberries in some flour before folding them into the batter. This step is not necessary, but it will help distribute the strawberries all over the the banana bread so they don’t sink to the bottom.
- Tent the loaf pan with foil during the last 10 minutes of baking if necessary. The bake time is between 50 and 60 minutes. However, sometimes at around 50 minutes the top of the bread will be golden brown but the center won’t be cooked through yet. The tenting tip helps to prevent the top from burning while baking the bread through.
- Try it with blueberries or raspberries, or mixed berries. It works the same way and adds great color to the banana bread recipe.
Frequently asked questions
How do you know when the bread is baked?
The strawberry banana bread will take around 50-60 minutes to make, and it’s best to check for doneness at around 50 minutes. The loaf will be golden brown in color and when a toothpick inserted near the center comes out clean.
How long does strawberry banana bread keep?
Once the bread has cooled, store it in an airtight container and it will be good for around 4 days. You can also freeze the bread, wrap it tightly in foil and place in a freezer bag.
This is such a great banana bread recipe that you can make for your friends and family to enjoy as a snack, for dessert or even from breakfast with a glass of milk. It’s moist, sweet and easy to prepare and everyone’s going to love it!
If you are a big fan of strawberries, be sure to check out my 2-Ingredient Strawberry Sauce and Strawberry Parfait recipes!
More quick bread recipes:
If you’ve tried this healthy-ish feel good Strawberry Banana Bread recipe or any other recipe on FeelGoodFoodie, then don’t forget to rate the recipe and leave me a comment below! I would love to hear about your experience making it. And if you snapped some shots of it, share it with me on Instagram so I can repost on my stories!
This Strawberry Banana Bread was originally published on October 15, 2016. I’ve updated the recipe slightly and re-sharing it with more step-by-step photos and a video tutorial. Here’s the original photo!
Subscribe by Email
Follow Updates Articles from This Blog via Email

No Comments