четверг, 29 июля 2021 г.

thumbnail

Keto French Silk Pie

This post contains affiliate links, and we may receive a small commission if you purchase through our site.


This Keto French Silk Pie is extremely rich, creamy, and chocolatey. The crispy oreo-style crust is filled with a scrumptious velvety mousse-like chocolate cream. And, it’s completely refined sugar-free, the perfect low carb dessert! Top this decadent chocolate pie with a homemade sugar-free whipped cream.
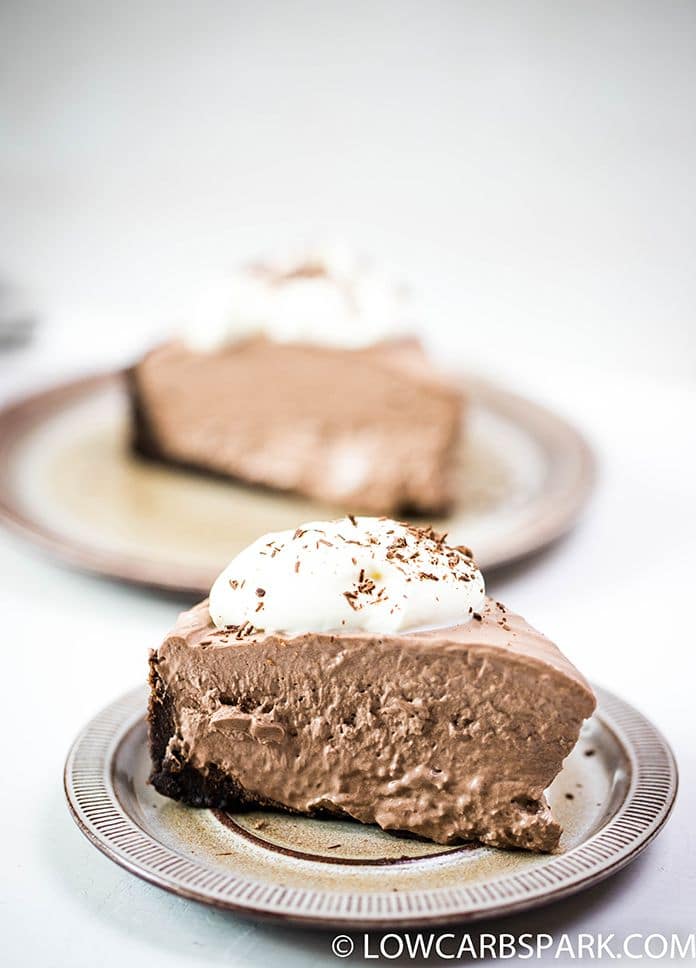

keto french silk pie easy recipe

If you’re a chocolate lover, this keto dessert is the best for you. It’s my take on the French silk pie which is present on our tables at Christmas, Thanksgiving, Easter, Birthdays. It’s a tradition in our family to make this incredibly decadent creamy pie!


I teased you on Instagram two days ago, showing you how creamy and thick this pie is. Oh, I love Boomerangs! I got tons of messages from you asking for the recipe. I know my readers love always want me to share more desserts.


Here at the studio, we are working really hard on finding and testing the best sugar-free keto desserts.


One thing is sure, and I’m thrilled to let you know that from now on, every Saturday we’ll have a new dessert recipe.


chocolate pie <br />

Keto Silk Pie Ingredients


For this silk pie, we divided the ingredients between the three main components: oreo crust, chocolate cream cheese filling, and sugar-free whipped cream.


  • The oreo crust is made with almond flour, cocoa powder, butter, and sweetener. This crust makes the pie extra chocolatey. A coconut flour crust is also amazing for this pie.

  • This filling requires no baking, no egg yolks, and no powders. It’s all made from natural ingredients such as cream cheese, whipping cream, dark chocolate, and a low carb sweetener. I’d eat this chocolate filling on its own. You can do that too!

  • For the homemade sugar-free whipped cream, you’ll need whipping cream, a powdered sweetener of choice and vanilla extract. It’s essential to use powdered sweetener to get a nice and smooth whipped cream.

delicious keto sugar-free pie recipe<br />

How To Make Keto Silk Pie


Remember I’m a huge fan of extremely easy to make recipes. Well, this recipe it’s a breeze to make, and only the crust requires a bit more work. If you have basic cooking skills and know to use a blender or a mixer, you can make this pie. In the end, it’s totally worth it.


A food processor makes this whole process a lot easier.


  1. Simply add all the dry ingredients and butter, pulse for a few seconds until everything is well incorporated. Add the egg and vanilla extract. Pulse, pulse, pulse, and a few seconds later, this delicious pie crust is ready.
  2. Transfer to a greased 9-inch pie pan. Blind bake the crust until fully cooked. It’s important to cool the crust before adding the filling.
  3. Next, make the sugar-free chocolate cream cheese mousse. You can find detailed steps in the recipe card below.
  4. In fact, making the chocolate filling is quite simple but very delicious. Simply mix all the ingredients until light and fluffy.
  5. I love to whip up homemade whipped cream because it’s insanely easy to make and we prefer it over the sugary varieties found in stores.
  6. It’s time to assemble the pie. Refrigerate for at least 6 hours before serving. Top each pie slice with a healthy dollop of whipped cream and chocolate shavings.

Devour with your friends and family. That’s it!

keto meal plan

Got Keto French Silk Pie Leftovers?


This low carb silk pie is best stored in the refrigerator. It should last for about 3-4 days. You want to keep the chocolate filling firm, and for that, you need a low temperature.


Keto Silk Pie is excellent to make ahead of time since the filling needs at least 6 hours to set.


Other Recipes You Might Like
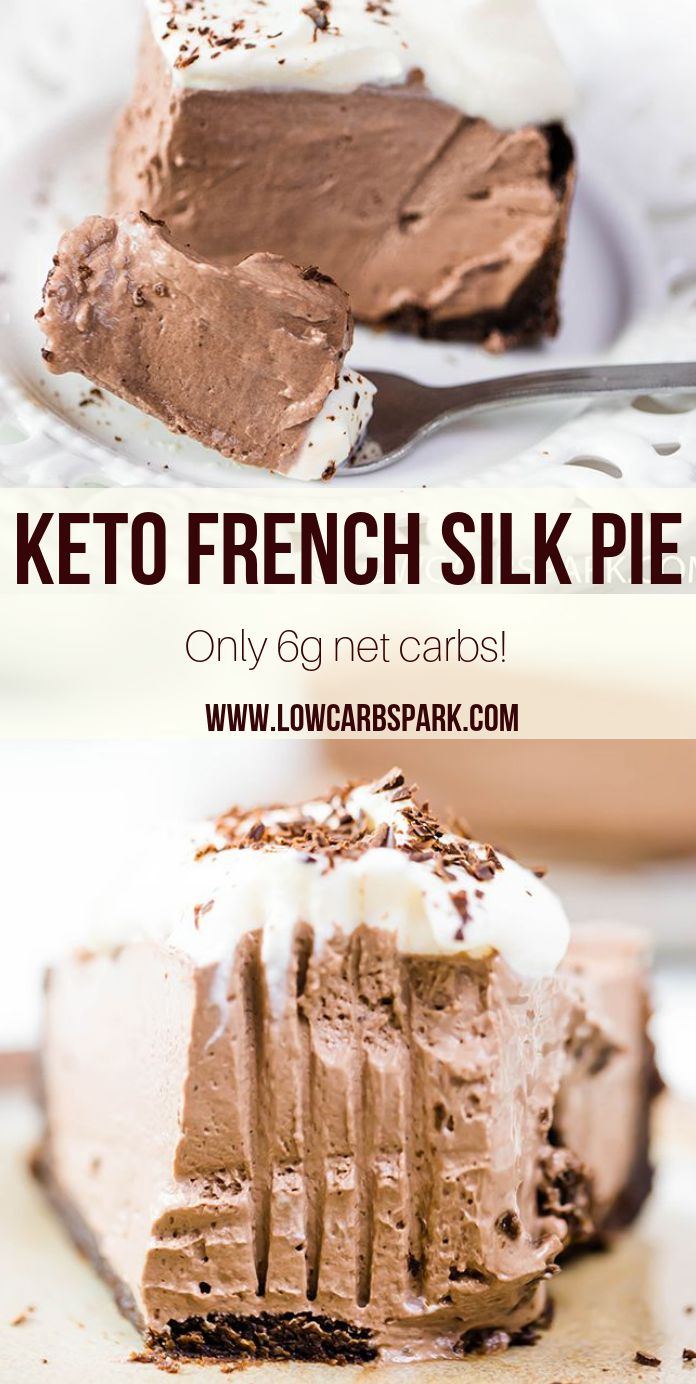

Keto French Silk Pie

thumbnail

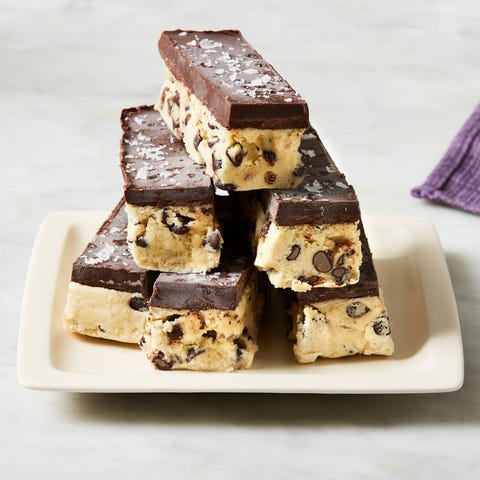
Keto Cookie Dough Bars

Few things are more comforting than edible cookie dough. These insanely good keto cookie dough bars are the perfect dessert or midday pick-me-up—especially with a freshly brewed cup of coffee.


Made this? Let us know how it went in the comment section below!


  1. In a large bowl using a hand mixer, beat butter, sugar, vanilla, and salt until light and fluffy. Slowly beat in almond flour until no dry spots remain, then fold in 1 cup of the chocolate chips.
  2. Coat a 8"-x-8" baking pan with cooking spray. Line with parchment, leaving an overhang on two sides. Coat parchment with cooking spray. Spread cookie dough evenly into pan.
  3. Combine remaining 2 cups chocolate chips and coconut oil in a medium microwave-safe bowl. Microwave, stirring every 30 seconds, until smooth and pourable. Pour chocolate over cookie dough layer and smooth. Garnish with flaky sea salt and place in freezer to harden, 2 hours or up to overnight.
  4. When ready to serve, remove from baking dish and cut into bars.

Keto Cookie Dough Bars - Delish.com

This content is imported from {embed-name}. You may be able to find the same content in another format, or you may be able to find more information, at their web site.


This content is created and maintained by a third party, and imported onto this page to help users provide their email addresses. You may be able to find more information about this and similar content at piano.io


вторник, 27 июля 2021 г.

thumbnail

June 4, 2012

Since summer has started.. Pinterest has been a favorite place.. again!


Here are a few of my favorite pins I pinned lately!


You can click on each picture to go directly to the pin.


I love the quotes, sayings, verses, etc... and these little cards area alwasys fun to read! This one is so true!


Miss Squirrel is so smart.. I really think I might do this color organization for next year. But, I fear it will be something I stress about. {Why is there a blue in the yellow drawer!?!?!}


Who doesn't love these little guys!


I really wanted to make homemade play dough all last year.


But, I never did it.


I hope to squeeze it in this winter!


I also love to pin yummy recipes! 90% of my food pins are sweets! I wish someone else would make them all for me! YUMMY! I did make this SUPER EASY cookie dessert last week {ok, I made it twice!}. Oh my, it was heaven!


Come follow me on Pinterest!


..and if you need a SMILE click here!


xoxo, Kacey


And, in other SAD news.. I am in class all week earning license credits! YUCK!


четверг, 22 июля 2021 г.

thumbnail

Instant Pot Sesame Chicken Recipe

Sharing is caring!


This Instant Pot Sesame Chicken recipe is better than take-out with a sticky-sweet sauce and a little kick that envelopes tender pieces of chicken!


My husband grew up in the Bay Area. He knows what good Asian food should taste like, so his standards are high. I had resolved never to make Asian food because his criticism wasn’t worth it.


Then I had success with Instant Pot Pho, and he praised it, giving feedback to perfect it. My confidence was high, so one night I made Instant Pot Pork Fried Rice with this Instant Pot Sesame Chicken. I’m certain he said he loved me at least twice during the meal!


You may also want to check out my Pinterest Instant Pot board for more great recipes like this pressure cooker Sesame Chicken!


colage of instant pot sesame chicken on plate, in chopsticks and closeup

We love it served with freshly steamed rice or with a side of broccoli, or even the broccoli mixed in.


It’s a delicious meal you’ll want to add to your rotation.


If you aren’t wanting the additional sodium, try using reduced-sodium soy sauce.


Instant pot Chinese sesame chicken with chopsticks

Serves 4


Prep Time: 5 minutes


Function and Time: Manual or Pressure Cook 3-minutes, saute 5-minutes


Cook Time: 3 minutes


Release Method + Time: Quick Release


Total Time: 26 minutes


iEasy Instant Pot Honey Sesame Chicken

Instant Pot Sesame Seed Chicken Ingredients:


1 pound chicken tenders, cut into 1-inch pieces


1 Tablespoon Oil


2 Tbsp. cornstarch, divided


2 cloves garlic, minced


1 Tbsp. Sesame Oil


1/2 cup soy sauce, low-sodium


1/4 cup ketchup


1/2 cup honey


2 Tbsp. water


2 Tsp. sesame seeds


1/4 tsp. red pepper flakes, optional


green onions, chopped, for garnish


Instant Pot Sesame Seed Chicken Directions:


Prepare the Instant Pot.


Press saute and add the vegetable oil to the Instant Pot.


Prepare the chicken.


In a small bowl, add 1 Tablespoon of the cornstarch.


Toss chicken pieces into the cornstarch until chicken is coated evenly.


Press Saute.


Add chicken and the garlic to Instant Pot and allow to cook in the oil for 4 minutes, or until golden brown.


Prepare the sauce.


In a small mixing bowl combine the soy sauce, ketchup, and red pepper flakes and stir until well combined.


Pour this sauce over the chicken in the Instant Pot.


Lock Lid and Set Time.


Lock the lid in place and turn the valve to the “sealing” position and press Manual or Pressure Cook.


Set the timer for 3-minutes.


Quick Release.


When the timer beeps, Quick Release.


Add Honey and Oil.


Open the lid once the pressure has been released and stir in the sesame oil and the honey.


Stir quickly to combine.


Thicken the Sauce.


Press Saute on the Instant Pot.


In a small bowl, whisk the remaining 1 Tbsp Cornstarch into 3 Tablespoons cold water until it is smooth.


Stir this cornstarch and water into the chicken, constantly stirring for 2 minutes or until sauce reaches the desired consistency.


Serve.


Remove chicken from Instant Pot and sprinkle with sesame seeds.


Serve alone, or over rice or noodles; we recommend this pork fried rice.


Garnish with green onions.


If you don’t have an Instant Pot, you can still partake. Try the Conventional method:


Mix up the sauce, cut up the chicken, and sear it quickly in the oil over medium heat.


Add the sauce.


Bring to a boil.


Lower the heat to low and simmer, covered for 5 minutes.


Mix the water and cornstarch and add to the sauce, stirring until incorporated and continue to simmer until thickened.


Instant Pot Sesame Seed Chicken Tips:


This recipe moves quickly.


Have every prepped before starting the recipe.


The longer you cook the mixture at the end during the saute setting, the thicker the sauce will be. Do NOT leave the pot unattended.


The Instant Pot® College Cookbook is the definitive dorm room solution for easy, homemade meals.


Cereal and pizza might be enough to sustain a crash study session, but the best brain food is a homemade meal.


The Instant Pot® College Cookbook saves college students from four years of nutrient deprivation with quick and easy, budget-friendly meals.


From grab-n-go Breakfast Burritos to late-night Macaroni and Cheese, this college cookbook contains 75 tasty meals that require no previous cooking or Instant Pot® experience to whip up.


Using easy-to-find and affordable ingredients, The Instant Pot® College Cookbook saves students time and money too with good fast food that rivals any take-out menu.


The Instant Pot® College Cookbook includes:


• Instant Pot® cooking 101 that explains pressure cooker settings for every type of food, tips, and FAQ.

• 75 home-style meals that include breakfast, everyday staples, soups and stews, meatless meals, poultry, pork and beef, dessert, and more!

• Fool-proof recipes that combine quick prep times with easy-to-find and affordable ingredients to suit student schedules and wallets.


Save ramen for emergencies with quick and easy recipes from The Instant Pot® College Cookbook.


Including this great Instant Pot Sesame Seed Chicken.


Try pairing it with this Instant Pot Pork Fried Rice recipe.


About Julee:


Julee Morrison is a blogger, mother of six, who lives in the foothills of Virginia with their two dogs.


Her first book The Instant Pot® College Cookbook: 75 Quick and Easy Meals that Taste Like Home celebrates her family recipes and making quick meals everyone will love.


Her writing has appeared on The Huffington Post, Scary Mommy, Pop Sugar, SheKnows, Yahoo Shine, Love What Matters, Ellen Nation, and her recipes have been featured on Bon Appetite, SparkPeople, and The Huffington Post.


вторник, 20 июля 2021 г.

thumbnail

Instant Pot Rice Pudding Recipe

Sharing is caring!


This is the easiest Instant Pot rice pudding recipe. So easy!


Plus, you probably already have the ingredients for this pressure cooker rice pudding in your pantry.


This is the most <a href=
The best Instant Pot Rice Pudding

When I lived in Miami decades ago, I came to love the food.


One of my favorites is Arroz Con Leche (or Rice Pudding).


It is creamy and delicious.


It’s rice pudding. Rice pudding!


It’s the ultimate in comfort food. It’s creamy, sweet, perfect.


It’s the dessert that you roll your eyes and sigh as you count all your blessings!


It’s like coming home.


It seems just to warm the soul.


Easy Instant Pot Rice Pudding

After realizing I was only getting to partake of this treat if Abuelita was making it, I took matters into my own hands and asked for the recipe.


I was young and had buckets full of rice after my first attempt, and the hours it took standing in front of the hot stove had me rethinking my love affair with rice pudding.


Things have changed, and now I make Arroz con Leche in the Instant Pot.


It takes about 35 minutes from start to finish and is really easy, yielding the delicious creamy texture I have come to love.


Some like theirs with butter, dates, jam, nuts, maple syrup.


The Spanish use raisins, cinnamon, coconut, and orange zest.


Try pumpkin spice, coconut.


I thoughWe experiment with different flavors of condensed milk.


Add more sugar or less sugar.


Experiment with different liquids…milk: coconut, almond, whole, skim, or try tea for a different taste.


Don’t use heavy cream; it will curdle.


Yuck!


Check out this recipe using Earl Grey Tea: Earl Grey Amira Rice Pudding with Wine, Lemon and Vanilla Nectarines Recipe


You may also want to check out my Pinterest Instant Pot board for more great recipes like this pressure cooker rice pudding!


This easy instant pot rice pudding recipe is a basic recipe.


It is quick to make, and by adding toppings, you can customize to your own liking.


It makes enough for the four of us to indulge and still have some leftover.


We love it warm.


Trust me; it’s so good warm.


We love it cold.


Please note that when you store it in the refrigerator, it will come back out “dry”…just add milk (or other liquid) and stir back to your desired consistency.


I love that the ingredients are my pantry’s basic staples.


Like, seriously…you probably already have everything you need to make this Instant Pot Rice Pudding Recipe.


We love it with generous amounts of cinnamon.


But I encourage you to personalize it with your own flavors.


Try coconut milk or Sweetened Condensed Coconut.


I’m partial to adding coconut manna (about a tablespoon) to the rice before cooking.


Start to finish it’s about 35-minutes. I can wash dishes from dinner and have dessert done at the same time.


When you take the lid off, it will look “mushy.”


Don’t panic


Just start adding the condensed milk and stirring.


It is going to get thicker the longer it sits.


Make a complete Spanish Meal that includes Abuela Approved Black Beans and Arroz con Pollo for a complete meal!


Instant Pot Rice Pudding Recipe


Ingredients:


2 cups milk (I use whole, but it’s up to you)


1¼ cups water


1 cup long-grained rice (you can use short-grain if you like)


1 can sweetened condensed milk


⅛ cup sugar


⅛ teaspoon sea salt (table salt works too)


1 teaspoon vanilla extract


Instant Pot Rice Pudding Directions:


Rinse rice well using a fine mesh colander (You don’t have to, sometimes I’m wild and just throw it in without the rinsing)


Add milk to Instant Pot


Add sugar Instant Pot


Add Salt to Instant Pot


Add Water to Instant Pot


Add rice to milk mixture


Stir


Place lid on Instant Pot, seal lid, and close vent.


Press the Porridge button


The rice will take 20-minutes to cook in this setting.


When the timer beeps, allow Natural Pressure Release for 10 minutes.


After 10 minutes, press the Cancel button and open vent to release pressure.


When depressurized, open lid.


Add Sweetened Condensed milk and vanilla.


Stir until well mixed.


Serve with optional toppings.


Enjoy this Easy Instant Pot Rice Pudding Recipe!


It’s the stuff sweet dreams are made from!


This is the most amazing Instant Pot rice pudding recipe ever. It takes just 20 minutes in the pressure cooker. Plus you probably already have the ingredients for this pressure cooker rice pudding in your pantry. #riceporridge, #instantpotriceporridge, #instantpotricedesserts, #ricedesserts, #pressurecookerricepudding, #instantpotricepudding, #instantpotdesserts, #pressurecookerdesserts, #bestinstantpotricepuddingrecipe, #glutenfreericepudding, #noeggricepudding, #Arrozconleche #instantpotarrozconleche #easyinstantpotricepudding


The Instant Pot® College Cookbook is the definitive dorm room solution for easy, homemade meals.


Cereal and pizza might be enough to sustain a crash study session, but the best brain food is a homemade meal.


The Instant Pot® College Cookbook saves college students from four years of nutrient deprivation with quick and easy, budget-friendly meals.


From grab-n-go Breakfast Burritos to late-night Macaroni and Cheese, this college cookbook contains 75 tasty meals that require no previous cooking or Instant Pot® experience to whip up.


Using easy-to-find and affordable ingredients, The Instant Pot® College Cookbook saves students time and money too with good fast food that rivals any take-out menu.


The Instant Pot® College Cookbook includes:


• Instant Pot® cooking 101 that explains pressure cooker settings for every type of food, tips, and FAQ.

• 75 home-style meals that include breakfast, everyday staples, soups and stews, meatless meals, poultry, pork and beef, dessert, and more!

• Fool-proof recipes that combine quick prep times with easy-to-find and affordable ingredients to suit student schedules and wallets.


Save ramen for emergencies with quick and easy recipes from The Instant Pot® College Cookbook.


Including this great Instant Pot Cranberry Sauce recipe. Try it on Instant Pot Mini Cheesecakes.


About Julee:


Julee Morrison is a blogger, mother of six, who lives in the foothills of Virginia with their two dogs.

Her first book The Instant Pot® College Cookbook: 75 Quick and Easy Meals that Taste Like Home celebrates her family recipes and making quick meals everyone will love.

Her writing has appeared on The Huffington Post, Scary Mommy, Pop Sugar, SheKnows, Yahoo Shine, Love What Matters, Ellen Nation, and her recipes have been featured on Bon Appetite, SparkPeople, and The Huffington Post.


пятница, 16 июля 2021 г.

thumbnail

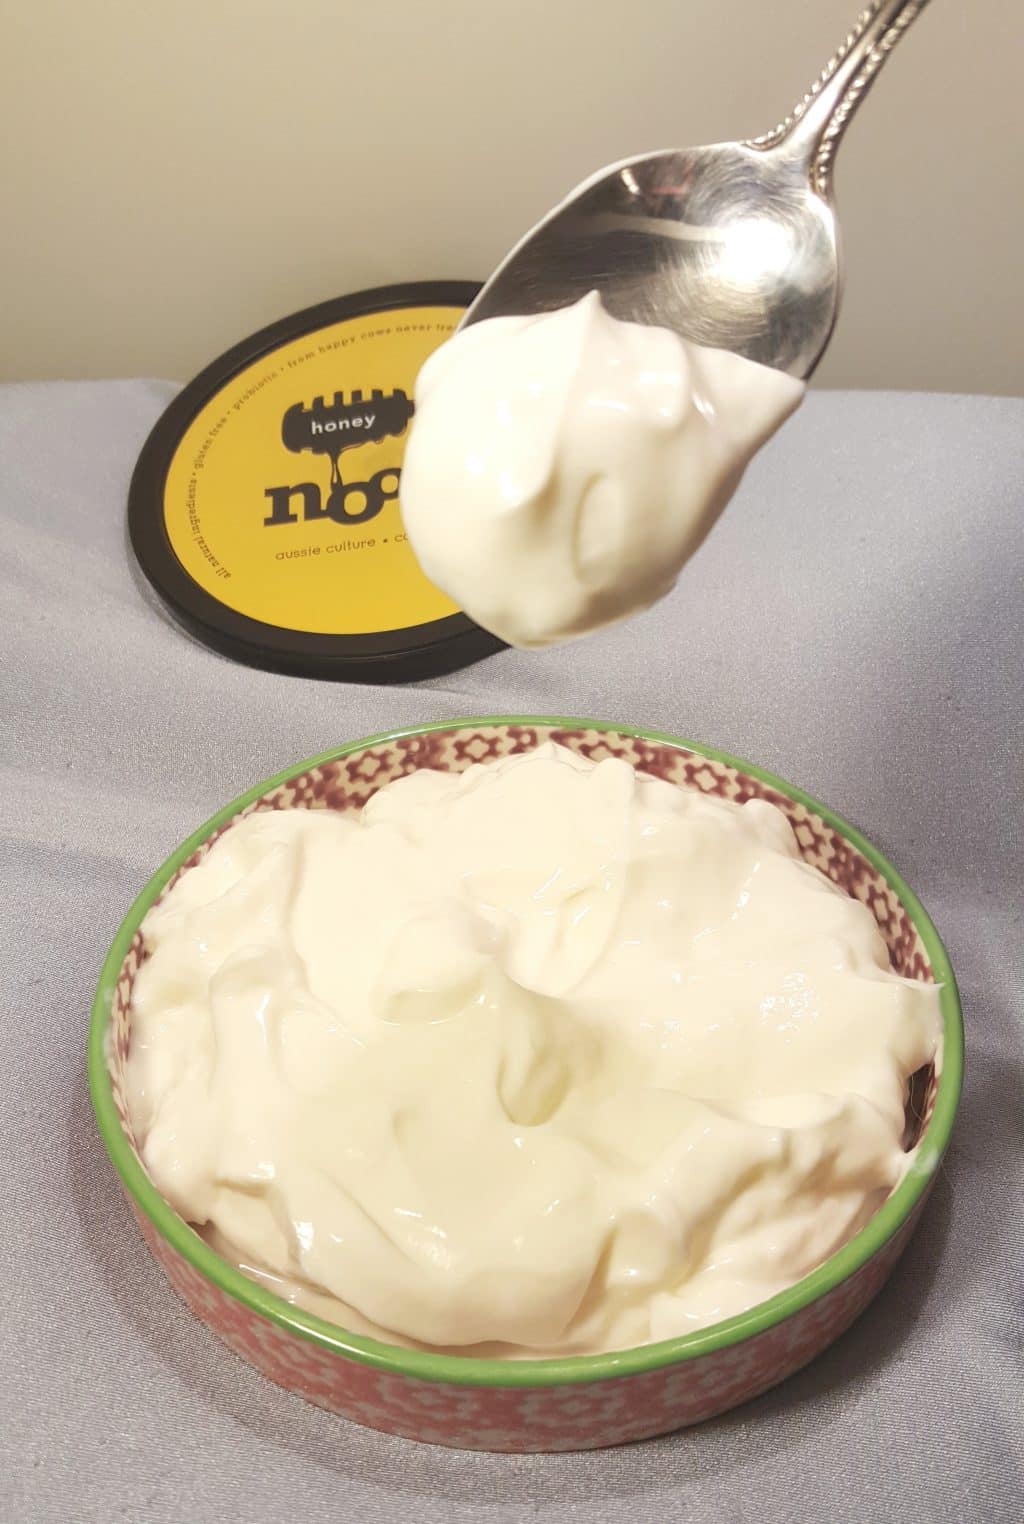
Instant Pot Homemade Noosa Yoghurt Copycat {Honey Yogurt}

Instant Pot Homemade Noosa Yoghurt is sweet, creamy, mild, wildly delicious and very similar in taste to the popular Australian type yoghurt.


Instant Pot Homemade Noosa Yoghurt {Sweet Yogurt}

Noosa Yoghurt has taken the World by storm. It’s sweet and creamy taste and luxurious, silky mouth feel, puts Yogurt into a whole new category. To me, it is more of a dessert type custard. It is delicious; there is no denying that! This Instant Pot Homemade Noosa Yoghurt {Sweet Yogurt} comes really close to the taste and texture of the original Noosa Yoghurt.


Cast of Ingredients for Instant Pot Homemade Noosa Yoghurt


This recipe is to mimic the Noosa “Honey” Flavor. If you want to make Lemon or Key Lime Noosa, you may want to greatly reduce the Sugar and Honey. Pressure Cooker Easy Lemon Curd or Pressure Cooker Key Lime Curd can then be added to the finished, chilled Yogurt.


After playing around with different combinations of Milk and Cream, to get the taste and consistency of this Copycat Noosa Yoghurt recipe, I used Skim Milk, plus Heavy Cream.


The Gelatine in the recipe helps bind the yogurt together with a shorter incubation period. Add a dollop of my Instant Pot Easy Lemon Curd and it will put you over the edge!


Forget everything you know about my Instant Pot Greek Yogurt, as this method breaks the boundaries of that recipe. You can even use organic and ultra-pasteurized milk!!!!


But, do check out my Instant Pot Greek Yogurt for fabulous thick Greek Yogurt, which is super healthy for the body.


If you do not have Noosa Yoghurt in your area to use as the Starter, plain Fage Yogurt can be substituted.


This step is optional and I know many who don’t want to do this or think it is not necessary. I wash my lid and remove all the removable parts, every single time I use my Instant Pot. Many people do not wash their lid and/or, do not change out their Silicone Sealing Ring. When using the Instant Pot to make Yogurt, the Instant Pot is not under Pressure, so please keep that in mind.


So, if you plan on using the Black Lid that comes with your Instant Pot, you will want to Sterilize your Instant Pot by adding water to the 3 “Rice Cup” fill line in your Cooking Pot. It is the rice measurement on the left side of the double measurement, not the liter measurement. Make sure to either switch out the Silicone Sealing Ring or remove it, if you are using the Black Lid. If you are using the Instant Pot Glass Lid, don’t worry about steaming the water to sterilize the Instant Pot or GoWise Multi Cooker.


The combination of the two types of Milk product, will give you the same creaminess and “mouth feel” of the popular Noosa Yoghurt. Pour both the Milk and Heavy Cream into your Instant Pot Pressure Cooker. This recipe will work the same way using a GoWise Pressure Cooker.


Place either your Instant Pot Pressure Cooker Lid or your Instant Pot Glass Lid on your Instant Pot. Yogurt is NOT done under pressure, so, whichever lid you choose to use is fine. You will want to take off the Lid and mix, throughout the “boil” cycle, so use which is most comfortable for you.


Using Cream in this recipe, seems to cause a film to form early on in the boil stage. Just use a Whisk, pull it out and discard the skin/film. Give the Milk a good stir. Stir a few times during the boil stage. It will help get up to temperature on just one “boil.”


The Instant Pot will beep and the display will say “Yogt.” Remove the lid and remove any film on the top of the Milk. Give it a quick Whisking. Use a Digital Thermometer and wait for the read out. 180 – 183 is very good. I hit 181 on my first try, which is perfect.


In a Bowl, combine Sugar and Gelatine. Combing the Sugar and Gelatine together will help to keep the Gelatine from clumping when hot liquid is added. Add 1 cup of the 180-183 degree Milk to the Bowl of Sugar and Gelatine and Whisk until Gelatine is dissolved. Pour this mixture back into the Hot Milk and stir, making sure the mixture is well incorporated.


If you keep Kosher, this Instant Pot Homemade Noosa Yoghurt Copycat can be made using this Kosher Gelatin.


Fill up your kitchen sink with cold water. I do not suggest adding ice cubes to the water, as you don’t want to shock the Milk. There will again be a skin on the top of the Milk, so just run the Whisk through and catch the skin and discard. The Milk will cool down within about 10 minutes or less. Whisking every so often, will speed up the process.


Prepare Starter and Temper


When making Instant Pot Greek Yogurt, you need a Starter with just milk and live enzymes. For this Instant Pot Homemade Noosa Yoghurt Copycat {Sweet Yogurt}, however, it is fine to use Noosa “Plain” Yoghurt or the Noosa Honey Yoghurt. If you don’t want to use Noosa or cannot find it, try using just plain Fage Yogurt. If you already make my Instant Pot Greek Yogurt or GoWise USA Greek Yogurt, you know that I use my own Starter Yogurt. I freeze it in Ice Cube Trays and then defrost, as needed. It is really fine to skip the Noosa and just use Plain Greek or Regular Yogurt.


So, here we go, a Yoghurt that tastes very, very close to the Original Noosa Yoghurt.


When the Milk has cooled down add the “Starter” Yogurt and Clover Honey to a Measuring Cup. Add about 1/2 cup of the 95-110 Degree Milk and Whisk together. Whisk until the Starter is smooth. Once Smooth, add it all to the Instant Pot cooking Pot and Whisk to incorporate.


Place either your Instant Pot Lid, which locks in place or your Instant Pot Glass Lid back on your Instant Pot. Remember, Yogurt is not under pressure! Push the Yogurt button and it should say “8:00.” If it doesn’t press the Adjust button until the time STARTS at “8:00.” Use the “-” button and adjust the time down to “5:00” hours. If you want a slight tang, try 6:00 hours. Personally, I prefer 6:00 hours.


After your yogurt has incubated for six hours, open the lid and give the Instant Pot Homemade Noosa Yoghurt {Sweet Yogurt} a really good Whisking. Give it a taste and add more sugar, if you prefer a sweeter yogurt.


Grab your Kerr Half Pint (8 oz) Mason Jars or Storage Containers and divide up the Yogurt. Place them in the refrigerator for at least 8-10 hours to allow time for the Yogurt to properly set. You have freed up your Cooking Pot and your in a short time, you will get to enjoy Homemade Noosa-like Yogurt.


The Instant Pot Homemade Noosa Yoghurt {Sweet Honey Yogurt} is delicious with just the honey flavor. If you are planning to make a flavored Noosa Yoghurt, by adding my Pressure Cooker Easy Lemon Curd, Pressure Cooker Easy Key Lime Curd, Pressure Cooker Fresh Berry Compote or another delicious flavor, make sure to reduce the amount of sugar to the incubation stage. You don’t want your Yogurt to put you into a sugar coma!


Kitchen Equipment and Essentials


Caring is sharing! If you would like to support This Old Gal, please share this recipe on Social Media, so that I can continue to bring you more wonderful recipes!


Here is your handy printable recipe:


PIN this Instant Pot Homemade Noosa Yoghurt Copycat {Honey Yogurt}!


thumbnail

Instant Pot Banana Nut Bread [Grandma Mills]

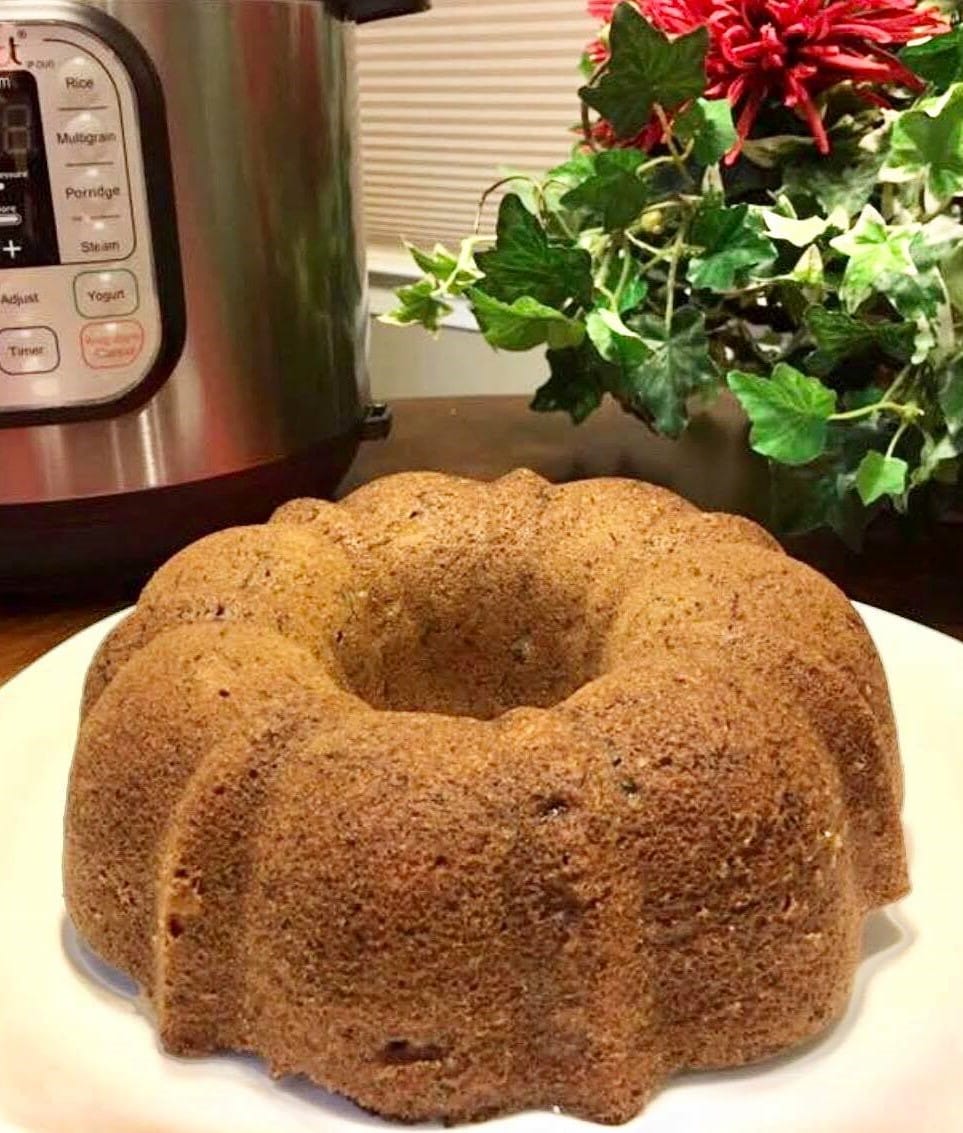
Instant Pot Banana Nut Bread was specialty of Grandma Mills. It’s a delicious dessert bread that cooks up fluffy and moist in the pressure cooker.


Instant Pot Banana Nut Bread

Banana Bread is one of those sweets that just about everyone loves. Jan Borden Freeman is a wonderful baker, as a result of her Grandma Mills teaching her to bake when she was in her 20’s.


Jan purchased an Instant Pot, Mealthy MultiPot or Pressure Cooker last year and has been cooking up a storm. Her most favorite and prized recipe from her Grandma is her Grandma Mills’ Banana Nut Bread. She realized that baked goods were not only possible in a pressure cooker, but they come out very moist and delicious.


Ingredients for Instant Pot Banana Nut Bread


Jan decided to convert her Grandma’s famous Banana Nut Bread and the very popular Instant Pot Banana Nut Bread was born.


Click to purchase this Nordic Ware 6 cup Bundt Pan.


The above photo of Jan’s cake is so beautiful, so I wanted to show case it. However, Jan says she gets her best results using this little Nordic Ware 6 cup Bundt Pan.


Instant Pot Banana Nut Bread is always a hit with Jan and her family. All the kids’ kids, still make this wonderful bread and remember their Grandma.


четверг, 15 июля 2021 г.

thumbnail

Instant Pot Baked Apples Recipe

Ever just get that craving for something sweet late at night but you don’t want to spend the time making something (or eat so many calories late at night)? Me too! Some of you know that I love my Instapot, mostly for easy weeknight dinners, but as I have recently discovered it’s easy to make super awesome desserts in it too! My little family loves all things apples. Applesauce, apple slices, apple pie, all of it. So naturally I had to try out some Instant Pot Baked Apples! It’s the easy and fast way to make baked apples, and man-oh-man are they tasty. The best part? It takes 8 minutes to make 6 of them. (Yes, really).


Want an easy but yummy dessert? Try my instant pot baked apples recipe, best with ice cream on top

Here how to make my Instant Pot Baked Apples Recipe


You Will Need:


  • 6 Apples (flavor of your choosing! I used Gala apples and they turned out perfect.)
  • 1 Cup Apple Juice (you could also use red wine)
  • 1/2 Cup Sugar
  • 2 tbsp Cinnamon

Super easy baked apples recipe made in the pressure cooker.

Directions for Instapot Baked Apples:


First, Wash and core your apples.


Next, Place up to 6 apples in your instapot. Pour your juice over them.


Then, Sprinkle your sugar and cinnamon over your apples.


Next, Lock your lid in place and cook for 8 minutes. Once done cooking you can either release the pressure manually or let it come down naturally.


Finally, Serve hot in bowls with some of your cooking liquid. I like to serve mine with whipped cream or ice cream.


That’s it! Just a few simple steps and about 10 minutes of your time and you have an awesome dessert for everyone. Enjoy!


These are my favorite pressure cooker accessories. I find the one I use the most is the Silicone starter pack. I use it for every meal I make in the pressure cooker or outside of it.


I use these all the time


This is my go-to cookbook.


This is the pressure cooker I have.


When I make eggs I use just my pot but people swear by this egg stand

and this one with the silicon molds that they also use to make egg omelets in.


When I am trying to do an entire meal at once I love this


and everyone needs one of these make sure you look at the size of the unit before you buy this cake pan.


For more instant pot recipes check out these cookbooks


The Essential Instant Pot Cookbook: Fresh and Foolproof Recipes for Your Electric Pressure Cooker


Dinner in an Instant: 75 Modern Recipes for Your Pressure Cooker, Multicooker, and Instant Pot®


Instant Pot Pressure Cooker Cookbook: 550 Recipes for Any Budget. Simple And Quality Guide For Beginners And Advanced. Vegan Instant Pot Recipes.


Instant Pot® Electric Pressure Cooker Cookbook: Easy Recipes for Fast & Healthy Meals


Weight Watchers Instant Pot Smart Points Cookbook: The Complete Weight Watchers Instant Pot Cookbook – with 60 Healthy & Delicious Instant Pot Cooker Recipes


Like this instant pot recipe? Also check out this Honey Glazed Ham in the Instant Pot


Looking for more yummy Instant Pot recipes? Check these out:


Drool-worthy Best Instant Pot Pressure Cooker Desserts


What’s your favorite Instapot recipe? I would love to hear about them in the comments below!


вторник, 13 июля 2021 г.

thumbnail

Il a 16 ans, il est vegan et fait des desserts qui semblent sortis tout droit d'un conte de fées

Avoir seize années, c'est une phase de la vie où l'on commence à sculpter sa propre identité.


C'est ce que vit Jose, un jeune de seize ans qui a par contre déjà les idées claires: il a choisi d'être végétalien et a la passion pour la cuisine. Sur son profil Instagram, il montre au monde entier ses préparations, qui ressemblent plus à des œuvres d'art qu'à des desserts traditionnels.


Regardez les photos suivantes pour avoir une idée plus claire de sa bravoure...


"La vie est trop courte pour manger des aliments ennuyeux", dit Jose, et c'est pourquoi ses gâteaux sont toujours colorés et gais.


image: naturally.jo

Smoothies, cupcakes et gâteaux sont les spécialités qu'il publie sur Instagram.


Chaque gâteau est différent des autres, et prennent vie d'une inspiration toujours différente.


Si vous pensez que la nourriture vegan est pauvre, limitée et pas très enthousiasmante, vous allez changer d'avis.


Nous vous mettons au défi de trouver une personne pouvant résister à la tentation de les manger !


Le jeune José n'a que 16 ans et compte déjà 780 000 followers sur Instagram : voir ses œuvres est un véritable plaisir pour les yeux.


Jose a compris très tôt qu'il aimait la nourriture, surtout la façon dont celle-ci se présente à l'écran.


C'est pourquoi il a décidé de devenir "food blogger" et de publier ses propres créations


Il s'est intéressé à la cuisine lorsqu'il a décidé de devenir végétalien à l'âge de 14 ans.


Et son régime vegan ne manque pas de sucreries heureusement!


Il semble que son amour pour l'alimentation vegan a conquis aussi sa mère et sa sœur.


Ses préparations ne sont pas seulement belles : Jose est aussi très attentif à la sélection des matières premières.


Pour cette raison, ses desserts sont aussi soignés du point de vue qualitatif.


Sa passion, ce sont surtout les cheese cakes, probablement parce qu'ils peuvent être personnalisés de mille façons.


Bien que ses recettes soient élaborées, elles parviennent à maintenir, en même temps, une certaine simplicité.


Au premier coup d'œil, en effet, on peut identifier tous les ingrédients, ou du moins les principaux qui composent un dessert.


En plus de la préparation, il y a aussi beaucoup de travail à faire pour soigner l'aspect esthétique : tout doit être agréable aux yeux.


Rien n'est laissé au hasard


Et il a appris cet art en moins de deux ans...


Ce jeune homme est destiné à réussir dans le monde de la pâtisserie !


thumbnail

How to spot a night shift nurse

The other day I was walking into the break room at work, just before my shift. As I came down the hall I could hear people exclaiming,


"I slept so good today! I got a full 8 hours!"

"Oh not me, I slept maybe four and this is my ninth day" replied the other nurse.

"Wow, I don't know how you handle that!" I replied as I walked into the room.

"Hah, do I LOOK like I'm handling it well?" We all laughed.


Probably the most common topic all night shift nurses have is sleep. The first thing we do when we see each other is say hello and then proceed to ask how many hours we slept that day. We exchange tips and tricks on the ways we manage to get as much sleep as possible. Ambien, trazadone, lunesta (yuck, I hated that one. It leaves this TERRIBLE taste in your mouth all day) benadryl, nyquil, advil PM, tylenol PM (by the way all of which are basically benadryl with other stuff added). A glass of wine before bed, those funny looking eye covers, black out curtains. Some of us switch our schedule on our days off and actually try to stay up during the day and a few of us don't (most of the time that's me).


Either way being a night shift nurse isn't always easy, especially when you work 12 hour shifts. Still, I prefer it over days because I get paid more and it is usually less stressful. You also learn to be very independent because you don't have all the resources around like you do on days. When you don't trust what an intern decides to do about your patient's crashing blood pressure at 2am....you learn to call the resident or the fellow. You learn to trust your intuition and you learn to ask A LOT of questions. Especially being a new grad like I am.


One of the ways I have learned to handle night shifts and 12 hours shifts much better is by making my food at the beginning of the week. Seriously, the last thing you want to do when you stumble home at 8am is make your lunch or dinner for the next night of work. You also don't want to have to put together breakfast if it means cutting into more of your sleep, and you sure as hell aren't getting up early to make food either. Plus, it stops me from eating junk food that is laying around my house or at work. Nurses are the worst at bringing sweets and fattening stuff to work.


So, I decided to take pictures and maybe share some of the recipes I have from what I made this week. This can help anyone who has a busy schedule; for 1-2 hours of work you have food for 5 days. I did this (sometimes) when I was in nursing school and working 18 hours a day, too. If I had done it every week then maybe I wouldn't have gained the 30lbs I did. Stupid nursing school.

Well, here's to eating healthy from now on!


Asparagus and green beans from the farmer's market by my house. I decided to go the easy route and get pre-cut, baby bella mushrooms (they were on sale).


Lots of garlic because I absolutely love garlic. Some chopped white or yellow onions too.


Some garlic powder, salt, pepper and a bit of olive oil to saute it all together.


There's one of my veggie dishes. Next I put some foil on my broiler pan and on one side had petite red potatoes sprinkled with salt, pepper, paprika and a bit of garlic powder.


On the other side of the dish I had brussel sprouts, some of the sliced mushrooms with garlic, (I really, really love garlic. Can you tell?), sprinkled each sprout with olive oil and salt and pepper.


I roasted them both at 350, the brussel sprouts cook first so I check them frequently and took those out when they were done and put the potatoes back in to finish cooking.


Next I put together some salads for the week. Heirloom tomatoes are my favorite because they're a little sweet, really beefy with virtually no seeds and they don't wilt the lettuce if you mix it in and package it up or a few days. And yes, those are edible flowers also. Another great farmer's market find.


Next, I made some sandwiches and instead of using mustard or mayo (yuck, I hate mayo) I used garlic roasted humus as my spread. Lean turkey meat, avocados, heirloom tomatoes, some of the lettuce from the farmer's market and the 100 calorie sandwich thins by Oroweat.


After it was all almost done I put together my dinner. Some of the salad, brussel sprouts and potatoes. On the side a basil, tomato, parmesan bocca burger (wasn't my favorite, it over cooks too easily and resembles a cement frisbee more than an edible patty at that point.)


The next day I was able to get the day off by using my vacation hours since our census was low. I ended up replacing my bocca burger for turkey burgers. Bread crumbs, garlic powder, tiny bit of paprika, salt, pepper and parsley mixed into ground turkey made for a great tasting turkery patty. No pictures of that though, sorry.


After I ate, I finished chopping up all the fruit I had. Boxed it up and was done. (By the way, I had some of this fruit with fat free cool whip for dessert yesterday and it was delicious and low calorie too!) I also threw some lite, canned fruit in with fat free cottage cheese to have for breakfast.


There it is. I have enough food to last me through 5 work days. I have a good amount of variety and just in case I need some snacks on the side I have fat free yogurt, wheat thins and progresso's healthy soups. (0-1 points on weight watchers)


Yum, now Im hungry. I think I'm going to get some banana bread that just finished baking. Recipe for that soon to come too!


понедельник, 12 июля 2021 г.

thumbnail

How To Make Healthy Peanut Butter Cups

Peanut butter cups that are actually good for you? It's possible! One bite of these 4-ingredient, vegan peanut butter cups and you'll be hooked.


vegan peanut butter cups

If you're a Chocolate Lover like us, you're going to love these vegan peanut butter cups.


Unlike those name-brand PB cups, which are loaded with sugar, milk and other questionable ingredients, these vegan peanut butter cups only have 4 ingredients! AND they're actually good for you!


What makes these vegan peanut butter cups so healthy is our Chocolate Lover Mix. It's made with 5 superfoods: cacao, carob, coconut, chia seeds and lucuma. Not only will this feel-good mix boost your mood, it will also curb your cravings!


We might be biased, but our vegan peanut butter cups are 100x better than any store-bought peanut butter cups. Did you make them? Let us know what you think!


VEGAN PEANUT BUTTER CUPS


MAKES 6 CUPS | VEGAN


INGREDIENTS:


  • 6 tbsp Chocolate Lover mix
  • ½ cup melted coconut oil (or cocoa butter)
  • 3 tablespoons maple syrup
  • ½ cup peanut butter or almond butter
  • sea salt

DIRECTIONS:


  • Line a muffin tin with 6 liners.
  • In a bowl, combine the Chocolate Lover mix, melted coconut oil and maple syrup.
  • Spoon 2 tablespoon of the chocolate mixture into the muffin cups and freeze for 10 minutes.
  • Add a spoonful of the peanut butter or almond butter to the center of each cup, then spoon the remaining chocolate mixture over the top.
  • Freeze for 1 hour before serving.

SUPER TIP: You can also substitute the nut butter with tahini or add Magic Mushroom Mix to the recipe!


More Peanut Butter recipes:

Snickers Shake

Healthy Cookie Dough

Peanut Dipping Sauce


пятница, 9 июля 2021 г.

thumbnail

How To Make Empanada Dough The Easy Way

How to make empanada dough the easy way. By hand or with a kitchen machine. Done in no time for tasty sweet or savory empanadas. Visit thetortillachannel.com for the recipes. #thetortillachannel #empanadadough #empanadadoughrecipe #howtomakeempandadough

That it can be quite easy to make yourself and create the best base for your sweet and savory empanada recipes. So are you ready to learn how to make empanada dough? Let’s get started!


How to make empanada dough the easy way. By hand or with a kitchen machine. Done in no time for tasty sweet or savory empanadas. Visit thetortillachannel.com for the recipes. #thetortillachannel #empanadadough #empanadadoughrecipe #howtomakeempandadough

What Is An Empanada?


Empanada originates from the Spanish word empanar which means covered by bread dough. That is just what we are doing with this recipe for empanadas dough.


An empanada is a baked or fried turnover consisting of a filling that is covered with pastry that is common in Latin America and the Filipinos.


The filling mostly of meat, cheese, fish, pork, apples, pineapples, or other ingredients, that are baked in the oven or fried in oil.


I first encountered empanadas in Spain in the local bakery shops that have long oval empanadas with savory fillings like:


However, the empanada is a world recipe as you can find in many countries and regions like North and South America, Europe like Spain and Italy but also Cape Verde and the Philippines.


Most likely this recipe traveled from Spain all across the globe.


Empanadas are also known as:


  • Hand pies
  • Turnovers
  • Galician pie or empanada gallega – this is a rectangular pie

Homemade Empanada Dough


Making homemade empanada dough is really easy. You can make it quite easy by hand but it is even easier if you have a kitchen machine.


In both cases, it does not require a lot of kneading which is a good thing. You can make it with a sweet or a savory filling.


If you have leftovers? Great, use it to make an empanada filling. When making easy empanada dough you can adjust the dough to your liking.


So add some spices and herbs to enhance the taste of the crust or make it sweet if you want to turn it into a sweet dessert.


You can make an empanada shell using a plate or lid. I have an empanada cutter that I can use to cut a disc and to fold an empanada.


Of course, you can fold an empanada by hand which is how it should be done but these empanada shapes work really well.


If you want to see how you can make empanada dough the easy way at home, take a look at the instruction video.


It shows you step by step instructions so you can easily follow along and make this recipe for empanadas dough.


It is really super easy to make especially with a kitchen machine.


Empanada Dough Ingredients


This flaky empanada dough recipe has a lot of similarities to pastry dough. One of the main ingredients is butter.


If you would want to make it vegan you could try vegan butter but be aware that vegan butter contains more water than regular butter.


Empanada dough ingredients contain the following items:


  • All-purpose flour
  • Butter
  • Egg
  • Salt
  • Water

How To Make Empanada Dough


To make empanada dough for baking start with the flour and salt. I use a kitchen machine and pulse the salt through the flour.


Then take the butter and slice it into small pieces about 15 pieces of butter. Again pulse the kitchen machine to combine the flour and butter.


You get a crumbly structure.


Whisk the egg in a separate bowl. Now it is time to add the beaten egg and drizzle the water in a steady stream while the kitchen machine pulses.


At this point, you will get a consistent flaky dough.Take the dough out of the kitchen machine and wrap it in foil.


Let it rest in the refrigerator for an hour. Then you can use it to make your empanadas.


You can leave it in the fridge if you plan on using it within a day or two or store it in the freezer.


If you are ready to use the dough to make the empanadas divide the dough in half. Roll the dough into a rectangle of about ¼ inch thick (a bit over ½ centimeter).


Take a small plate, an empanada cutter, or a large cookie cutter ring to cut the empanada discs.


If they are too thick flatten the empanada discs with your rolling pin.


That is it, your empanada dough is ready to use.


How Long Should You Bake Filled Empanadas?


When you have made your empanadas and brushed them with egg wash all you have to do is preheat your oven to 400℉.


Bake for 20-25 minutes and your empanadas should be golden brown else leave them in for another 5 minutes.


Freeze Empanada Dough


Empanada dough freezes really well so you have to options after making the dough:


  • Freeze dough – cut the desired amount of dough, wrap in plastic, and store in the freezer
  • Freeze empanada shells – cut the desired amount of empanada dough. Roll the dough and cut empanada discs with a plate or empanada shape. When storing the discs, separate the empanada shells with some baking paper

When you want to use the empanada shells, thaw about 15 minutes before use. If you flatten the complete dough it will take at least 45 minutes to thaw.


You can store the dough in the fridge but not for more than 24 hours. If you need more time cut the dough in portions and freeze.


How Big Is An Empanada?


Traditional an empanada is six inches in diameter. When you use these empanada press or empanada mold you get 5 different sizes 6.1 inches, 4.7 inches, 3.7 inches, 3 inches, and 2.7 inches.


You can make an empanada any size you want or adjust to the tools you are using like:


  • Empanada cutter
  • Cookie-cutter
  • Small plate
  • Biscuit cutter
  • Coffee lid
  • Circular cutter

If you want to make mini empanadas also know all empanaditas they measure three inches in diameter.


Empanada Recipes


If you make your own dough take a look at this recipe to fill it:


Have fun making this homemade recipe for empanadas dough!


Made a recipe please tag @thetortillachannel on INSTAGRAM, PIN on PINTEREST, and like us on FACEBOOK for more information and updates.


DON’T FORGET TO SUBSCRIBE TO THE TORTILLA CHANNEL NEWSLETTER FOR FREE TO RECEIVE NEW RECIPE NOTIFICATIONS INTO YOUR INBOX!


This post may contain affiliate links. Please read my Privacy Policy for more information.


thumbnail

Hot chocolate bomb

Hot chocolate bomb

la recette tendance à tester


À la une cuisine


Trouver une recette


Le Meilleur Pâtissier 2020 : Cyril Lignac et Mercotte en Amérique

Tartiflette maison

Gelée de coings

Pot au feu


Recettes de gratins d'automne


Rapide
Recettes express pour l'automne

Chocolat
Recettes de chocolat chaud pour se réchauffer

Châtaigne

Recettes avec des châtaignes


Concours
Gagnez 2 Cookeo Touch wifi noir de Moulinex

Recettes au potimarron


Gâteau aux pommes


Gaufre à l'ancienne


Crème aux oeufs


Tarte tatin


Des crêpes en veux-tu en voilà !


Recettes de la blogueuse Catherine Eliot


Recettes de la blogueuse Natalia Kriskova

Recettes Amandine Cooking

Recettes de la blogueuse Aurélie Sorbe

Recettes de la blogueuse La Cuisine Gourmande de Deldel


Apéritif


Plats de viande


Desserts


Recettes végétariennes


Recettes au Thermomix


Pizzas

Verrines

Chocolat


Recettes de grillades et barbecue

Recettes à déguster sur la route des vacances

Recettes de poissons d'été

Recettes de tartes aux fruits d'été

Navarin d'agneau bio à la châtaigne et au potiron

Jarret de porc cuit en deux façons et ses petits légumes

Brioche moelleuse et mie filante


Cannelloni de Saint-Jacques de Normandie selon le Chef David Gallienne


La Coquille Saint-Jacques de Normandie se plie en 4, par le Chef Juan Arbelaez

Saint-Jacques de Normandie acidulée et betterave, fruits de la passion et poivre de Timut par la Cheffe Coline Faulquier


Hot Chocolate Bomb : la meilleure recette de chocolat chaud

Donuts américains au chocolat

Quiche au thon (pâte brisée maison express)


    Forum


About

Поиск по этому блогу

Технологии Blogger.