понедельник, 31 мая 2021 г.

thumbnail

Eggless black forest cake recipe

Eggless black forest cake recipe – delicious, rich & a perfect eggless cake to bake for occasions & celebrations. Wishing everyone a very happy & prosperous New year. Black forest cake is a classic dessert made with several layers of chocolate sponge cake soaked with kirschwasser (cherry spirit), then sandwiched with whipped cream & cherries.


eggless black forest cake

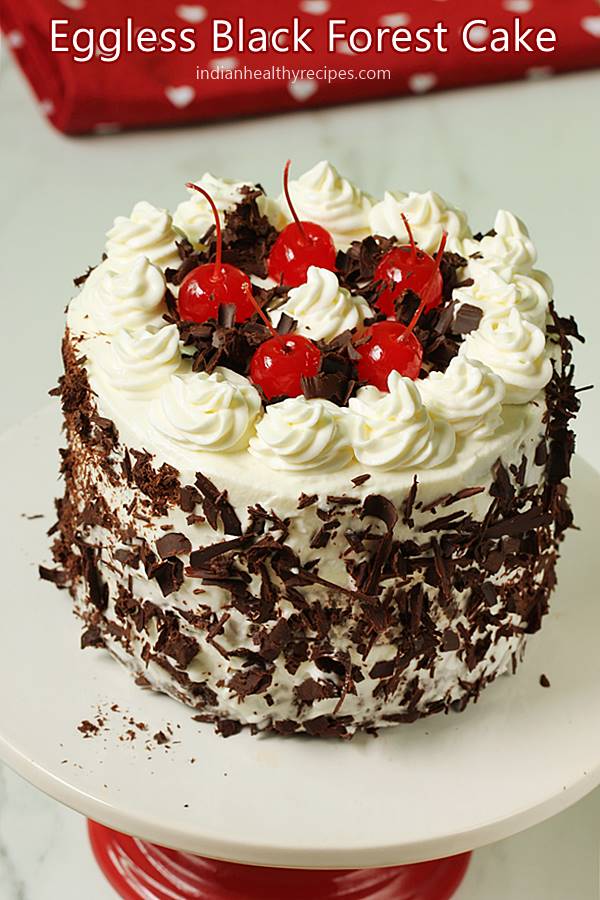
Lastly it is decorated with some whipped cream frosting, maraschino cherries & chocolate shavings.


Black forest cake is not the same across the world. It is made with slight changes based on the region. In India black forest cake is made without alcohol. The recipe shared here is not only alcohol free but is also eggless.


Step-by-step photos


How to make eggless black forest cake


1. For stepwise photos of the eggless cake, you can check the eggless chocolate cake recipe post. (link in the introduction of this post).


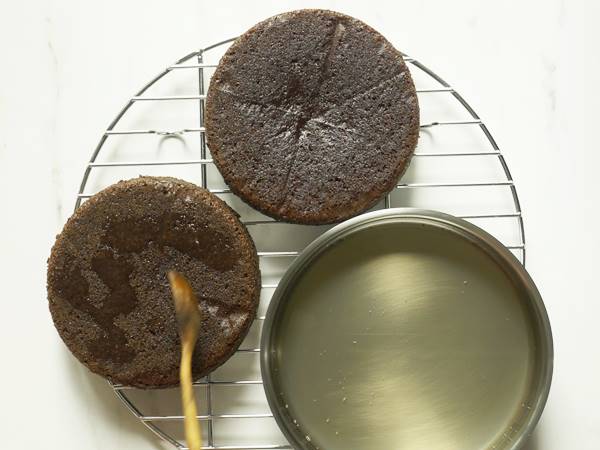
2. Remove the cakes from the pan and cool completely. While the cakes cool, make the sugar syrup or cherry syrup. To make sugar syrup, boil 2 tbsp sugar with 4 to 5 tbsp water until the mixture comes to a rolling boil. or make cherry syrup by adding 3 tbsps water to chopped cherries.


Rest for 45 mins. Later strain the syrup and use it here. Pat the cherries gently to remove excess juice.


3. Pour 1 to 2 tbsps of the syrup evenly on the cakes. Set this aside.


Pour the syrup evenly on the cakes

Whipping cream for eggless black forest cake


4. Chill the bowl & beater for few hours. Then transfer the cream to the chilled bowl and start whiping on a low then to medium speed until it turns bubbly and slightly thick.


beat the cream for eggless black forest cake

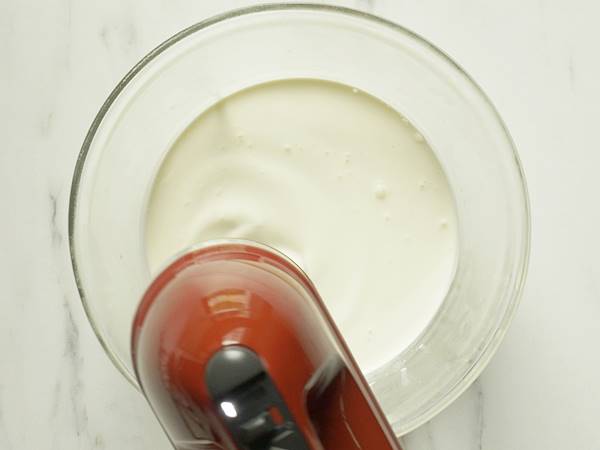
5. Then slowly add powdered sugar.


6. Whip until stiff peaks. Be careful not to over whip.


7. Fit a pipping nozzle inside a piping bag. Transfer half cup whipped cream to it. Avoid handling the bag a lot as it will soften the cream. Immediately refrigerate.


Decorating eggless black forest cake


8. The eggless black forest cake is decorated with some chocolate shavings and cherries. For the chocolate shavings you can use any good quality chocolate. Keep the chocolate bar out of the fridge until it is easy to handle then using a grater or knife just make some shavings. You can make this ahead and refrigerate.


9. Add a tsp of cream to the cake stand and place 4 parchment papers on all the 4 sides. Then place one layer of the cake over it. Spread cream on the cake. Then layer the chopped cherries.


10. Place another cake on top and spread the frosting there too. Do not handle the cream a lot, it begins to deflate.


11. Spread a thin layer on the sides as well and refrigerate for 45 to 60 mins.


12. Repeat frosting cream all over the cake. Then decorate the cake on the borders.


13. Cover the sides of the cake with chocolate shavings. Then place the cherries on top and fill the gaps with chocolate shavings.


Immediately refrigerate the black forest cake until needed.


Tips on eggless black forest cake


1. Making chocolate cake

For the base, I have roughly adapted this Eggless chocolate cake recipe. If you eat eggs and prefer a fluffy chocolate spongy cake then you can use this Chocolate sponge cake recipe.


If you do not have a oven, you can also bake this cake in a cooker or heavy bottom pot or pan following this Cooker cake recipe


2. Cherries

Fresh cherries are best to use for layering & decorating. Alternately maraschino cherries or tinned cherries can be used if you like the flavor. Just pit the cherries and chop them to bite sizes.


Set aside some whole cherries for decoration. Allow the cherries to come down to room temperature before using it on the cake.


3. Cherry syrup

Originally kirschwasser, a clear spirit made of cherries is used to moisten the cake. Alternately freshly made cherry syrup or sugar syrup can be used. You can also use the cherry syrup from canned cherries.


Do not use the syrup from the maraschino cherries as the flavor is not good due to the additives. This can be prepared 1 day ahead.


4. Frosting

For the frosting, whipping cream with at least 36% or above works best. I used cream with 36% fat. The more fats the more stable your whipped cream frosting will be.


I haven’t used any stabilizers but used homemade confectioners sugar. I used 1 tbsp cornstarch for every 1 cup of sugar & blended them together.


More Cake recipes,

Biscuit Cake


Eggless vanilla cake

Chocolate cake

Banana cake

Eggless carrot cake


Recipe


Eggless black forest cake


пятница, 28 мая 2021 г.

thumbnail

Edible Keto Cookie Dough

This post contains affiliate links, and we may receive a small commission if you purchase through our site.


Edible keto cookie dough is easy to make in just 5 minutes. These keto chocolate chip cookie dough bites are made with almond flour, coconut flour, and keto sweetener. Enjoy a delicious no-bake keto treat that happens to taste just like the real thing!


keto cookie dough keto dessert

Let me tell you that I am completely obsessed with these keto cookie dough bites. It is a no-bake keto recipe that’s sugar-free, grain-free and it’s 100% delicious. And the best part, it’s ready in less than 5 minutes.


Eating raw cookie dough is my biggest pleasure ever since I was a child. Whenever my grandmother was making cookies with sugar and tons of butter I sat there waiting for the perfect moment to steal a few cookie batter bites.


She told me that eating raw cookie dough can be dangerous, but I still loved it and I’m still alive, so I guess it wasn’t entirely true. I had to come up with a balanced edible keto cookie dough version of it.


Is there anything better than keto cookies? No matter how much we love keto chocolate chip cookies, flourless double chocolate cookies, or keto lemon cookies, sometimes I crave raw cookie dough.


Watch our quick video to see exactly how to make the keto cookie dough recipe.


Ingredients for the keto cookie dough


You’ll need a few ingredients to make this delicious keto dessert. You probably already have them in the house. So, what are you waiting for? Grab all the low carb ingredients and turn them into a delicious keto cookie dough. Here’s everything you’ll need:


keto cookie dough ingredients

  • almond flour
  • coconut flour
  • keto sweetener
  • butter or any nut butter or coconut oil*
  • heavy whipping cream or coconut cream*
  • vanilla extract
  • a pinch of salt

*replace if you want vegan paleo keto cookie dough


How to make keto cookie dough?


The instructions for this recipe are so simple. All you need to do:


keto meal plan

  1. Mix all the dry ingredients: almond flour, coconut flour, sweetener, and salt.
  2. Add in softened butter or coconut oil, heavy whipping cream or coconut cream, vanilla extract, and mix well.
  3. If the batter is too dry, add more unsweetened coconut milk or almond milk until desired consistency.
  4. Fold in the chocolate pieces and roll into balls for easier portion control.

How many carbs are in keto cookie dough bite?


I divided my batter into 16 equal pieces that came out to 2g net carbs each. Here’s a list of the full macros:


  • 98 kcal
  • 3g carbohydrates
  • 1g fiber
  • 2g net carbohydrates
  • 2g protein
  • 9g fat

Is this cookie dough recipe paleo?


The best part is that with a few twists, you can turn it into a paleo-approved recipe. Use coconut oil instead of the butter and replace the heavy whipping cream with coconut cream. With these alterations, the recipe is also vegan, so it’s great to try a vegan high-fat keto diet.


More Easy Keto Desserts


Edible Keto Cookie Dough

пятница, 21 мая 2021 г.

thumbnail

Dutch Apple Pie

This Dutch Apple Pie is one of my all time favorites. Something about warm apples, brown sugar, and whipped cream that make the perfect combination.


This pie has rave reviews and is loved by everyone plus it’s so simple to make. I’m sure you will love it just as much as my family does, you have to try this one!


dutch apple pie on a white plate

Best Dessert Recipe:


I love a good Classic Apple Pie Recipe, but the crumbly topping on this Dutch Apple Pie is so good I may have a hard time picking which one will be going on my table for dessert I could make both Dutch Apple Pie and the classic, but I also want, cherry pie, chocolate pie, peach pie, pumpkin pie, oh have I mentioned that I really like pie? I hope my guests do as well.


When planning desserts for a holiday or get together I could honestly skip the cake anytime, and go without. Pie, on the other hand, is my kind of dessert. Sweet and warm fruit with a flaky crust then topped with whipped cream or ice cream… or both ��


In my option there is no better dessert! Since I love apple pie so much I made it in several different forms. Make sure to check out all my favorites when you are down with this recipe.


How to make Dutch Apple Pie:


Start by preheating your oven to 375 degrees F. Then peel, core, and slice your apples. For this recipe, I used granny smith apples.


Once peeled I used an apple slice then sliced the apples again. You want them pretty thin. Once they came out of the apple slicer I sliced each slice into at least 4 other thinner slices (see picture 1 and 2).


Once your apples are ready you can place them in a large mixing bowl. Place the rest of the filling ingredients into the mixing bowl, and mix until apples are coated (see picture 3 and 4 below).


Allow your apples filling to sit for at least 5 minutes before adding them to the crust. You can work on the topping while you wait for your apples to be ready.


Pro Tip: When adding sugar to your apples it will release water that is in the fruit. You don’t want this water sitting in the bottom of your pie so allow your apples to sit and rest will give your apple time to draw that water out in the mixing bowl. The longer the sit the better. I would give it 1-2 hours to be safe.


Dutch Apple Pie Topping:


While you allow your apples to rest start working on your crumble topping. In a separate mixing bowl use a fork to combine all topping ingredients until the mixture is well combined and crumbly. You can use a fork but I also like to get in with my hands.


Pinching the butter into small pieces and having them coated in the dry ingredients. Make sure you have a small crumble before adding it to the top of your pie. When the topping is done it will look like sand. Below you can see in photo 5 what it looks like before and in photo 6 what it looks like after mixed well.


Pro Tip: The topping calls for cold cold butter that will melt when baking. Make sure your butter is very cold and firm right out of the fridge when you are ready to use it. You want to break up the butter into small pieces with the rest of the ingredients.


Dutch Apple Pie Crust:


Store bought or a homemade crust will work fine for this recipe. Whatever you feel comfortable with. Most crust recipes and crust from the store will come with a top and bottom crust. For this recipe, you will only need one crust since you will have the crumble topping.


If you want to make it homemade then try out my recipe homemade pie crust. It’s so simple to make and taste amazing! Once your pie crust is ready you can place it in an empty pie pan (see picture 7).


Pie Pan Size:


For this recipe, I used a standard 9-inch pie pan. I did place all 8 cups in the one pie pan. The apples will cook down and all fit into the pan perfectly. You, of course, could add less for a less full pie.


Dutch Apple Pie Filling Tips:


Your apple pie filling should be ready to be placed into your pie crust. To make sure I don’t get any of that juice I would suggest using a slotted spoon (see picture 8) to scoop out the apples and place them into your crust (see picture 9).


Slowly place all your apples into your pie crust. In the end, you should have a very full pie and juice leftover in your mixing bowl.


You can see in the picture below on the left (picture 10) all the juice that was leftover in my mixing bowl. This could make your crust very soggy if you add it to your pie. When your apple pie is full (picture 11) then you are ready to top it.


Next top your pie with your topping. Using a crumbling motion (see picture 12 and 13) over the pie to make sure you break up the topping and leave any leftover dust in the bowl. You want to make sure everything you add to the top of your pie is well coated in your butter to prevent burning.


Baking Dutch Apple Pie:


I like to play it safe and place a baking sheet under my pie. This way if I have any leaking or dripping I can catch them and clean it easily. Place your pie in your preheated oven and bake for 50-55 minutes


Once your pie is done allow resting for at least 10-20 minutes before serving. The longer it rests the firmer it will be and easier to serve. I serve mine with whipped cream or ice cream on top.


Dutch Apple Pie:


Here are a few of my favorite dutch apple pie inspired recipes.


  • Dutch Apple Pie Bread: This bread is so simple to make and had a great apple pie flavor.
  • Dutch Apple Pie Bars: These bars are perfect for serving at a party or holiday get together.
  • Apple Pie Cookies: These cookies are my favorite! They are so easy to make and the perfect fall cookie recipe.
  • Apple Pie Dip: If you want to skip the pie set up try this dip recipe instead.

If you tried this Dutch Apple Pie or any of my recipes I would love to hear from you, leave me a comment below. You can also connect with me on FACEBOOK, INSTAGRAM, and PINTEREST. I would love for you to follow along and discover more amazing recipes.


thumbnail

Divinity Fudge

Divinity Fudge

Since 1955 green bean casserole has been a holiday staple in households across the country. Whether you prefer the classic recipe, a fresh twist, or adding bacon, this side dish is a must for any family dinner. Green bean casserole belongs on your holiday menu, so scroll down to find the recipe you’re making this […]


There’s nothing like a big ol bowl of chicken and dumplings on a cool night. The perfect family dinner, this is comfort food that everyone loves. From Crock Pot recipes to casserole ideas to Grandma’s old-fashioned recipe, these homemade chicken and dumplings recipes are delicious! So grab that package of chicken and get ready to […]


No matter if you’re first learning how to make grits or you know your Grandma’s recipe by heart, you’re going to find a great grits recipe to try. Casseroles, muffins, fried grits, cheese-tastic, and the classic creamy grits are all listed below – get ready to drool! Perfect for breakfast, lunch, or dinner, grits are […]


среда, 19 мая 2021 г.

thumbnail

Dirt Pudding Cups With Gummy Worms Recipe

Please Share...00


Dirt Pudding Cups With Gummy Worms Recipe
Dirt Pudding Cups With Gummy Worms

“Worms in Dirt” may not sound appetizing, but the taste of this easy dessert will make you a believer! These chocolate pudding cups are decorated with crushed cookies and gummy worms, to make a creepy-crawly treat that kids will love to help make and eat.


Dirt Pudding Cups With Gummy Worms

This recipe doesn’t require any cooking and comes together in about 15 minutes, so it’s the perfect activity to do with young helpers on a warm summer’s day. Grab your worms and let’s go…


worms-in-dirt-pudding-cups-recipe-1.jpg

Worms in Dirt Pudding Cups Recipe


Ingredients


Yield: 8 cups


Prep time: 30 min


  • 1 15-ounce package chocolate sandwich cookies (like Oreos)
  • 1 3.9-ounce package chocolate instant pudding
  • 2 cups cold milk
  • 8 ounces whipped topping (like Cool Whip)

worms-in-dirt-pudding-cups-recipe-2.jpg

The first order of business when making “worms in dirt” is, of course, to make the dirt. Place the chocolate sandwich cookies in a large zip-top plastic bag, and use a rolling pin to crush them into small pieces. Don’t worry about removing the cream filling before putting the cookies in the bag–at first they will clump together, but as you continue to crush them, the cream will blend with the cookies and you won’t even notice it.


worms-in-dirt-pudding-cups-recipe-3.jpg

Continue to crush the cookies in the bag until they are in fine crumbs. A few larger pieces are okay, too–after all, dirt comes in different sizes!


worms-in-dirt-pudding-cups-recipe-4.jpg

Next, make the pudding. Pour the dry pudding mix into a large bowl, then add the cold milk. Whisk everything together until all of the dry pudding dissolves and it’s smooth and free of lumps.


worms-in-dirt-pudding-cups-recipe-5.jpg

Let the pudding sit for about 5 minutes, until it thickens and is no longer liquid. If it has the delightfully gloppy texture of pudding, you’re ready to go on.


worms-in-dirt-pudding-cups-recipe-6.jpg

Add the whipped topping and approximately half of the cookie crumbs. You don’t have to measure, just eyeball half the bag and pour it in.


worms-in-dirt-pudding-cups-recipe-7.jpg

Gently stir everything together until the streaks of whipped topping disappear, and the cookies are well-mixed into the pudding.


worms-in-dirt-pudding-cups-recipe-8.jpg

Divide the pudding mixture evenly between eight cups–each should hold a little over 1/2-cup of pudding. You can fill them however you’d like–I prefer to use a large ice cream scoop because I think it’s a little neater and faster that way.


worms-in-dirt-pudding-cups-recipe-9.jpg

Tap the cups on the countertop a few times to level the pudding, then insert 3 gummy worms into the pudding and press them down a little so that they’re embedded.


worms-in-dirt-pudding-cups-recipe-10.jpg

Pour the cookie crumbs over the pudding and gummy worms so that the entire top is covered with “dirt.” Smooth it into an even layer with your hands.


Dirt Pudding Cups With Gummy Worms

Your Worms in Dirt are done! This is such an easy and fun recipe to make with kids during the summer! If you want to make them even more special, you can hide the cups in small terra cotta flower pots, or make one large batch in a big flower pot. Enjoy!


And here’s an easily pin-able image for you, with all of the step-by-step photos in one place:


How to make Dirt Pudding Cups with Gummy Worms

вторник, 18 мая 2021 г.

thumbnail

Dessert Ravioli

How genius is this method?! You can fill these "ravioli" with all sorts of things, from fruit fillings to peanut butter and chocolate. We chose Nutella because we're obsessed with it.


  1. Preheat oven to 375° and line a medium baking sheet with parchment paper. In a medium bowl using a hand mixer, beat cream cheese, Nutella, melted chocolate, vanilla, and salt until smooth.
  2. Flour a clean surface and roll pie dough until it's very thin (about 2 cm!). Drape pie dough over ice cube tray. Use the knuckle of your pointer finger to press the dough into the indents in the ice tray. Spoon Nutella mixture into each well of the ice cube tray, then trim the overhanging edges of the pie dough. Brush any exposed pie dough on the ice tray with egg wash.
  3. Roll out excess pie dough then place on top. Use a rolling pin to seal the two pie dough layers and trim any excess with a paring knife. Turn out onto a cutting board and cut in between each "ravioli" to separate.
  4. Place on prepared baking sheet about 2" apart, brush with egg wash, and sprinkle with cinnamon-sugar.
  5. Bake until golden, about 20 minutes.

Dish, Food, Cuisine, Ingredient, Produce, Baked goods, Dessert, Recipe, Finger food, Snack,

This content is imported from {embed-name}. You may be able to find the same content in another format, or you may be able to find more information, at their web site.


This content is created and maintained by a third party, and imported onto this page to help users provide their email addresses. You may be able to find more information about this and similar content at piano.io


пятница, 14 мая 2021 г.

thumbnail

Des délices de recettes pour la saison estivale

L’été, à l’heure du déjeuner on recherche tous un petit coin de paradis ensoleillé. Les repas se font donc en terrasse, dans un parc ou même à la plage. Mais si on adore profiter du soleil pour prendre des couleurs et se détendre, une chose est sûre : on ne veut pas de plats lourds qui nous restent sur l’estomac ! Exit la raclette et bonjour les salades. L’été on veut du léger, du frais, des légumes, des fruits et… des glaces ! Évidemment, on n’oublie pas de se faire plaisir. Voici quelques idées de plats et de desserts haut en couleur pour cette période estivale.


1.jpg

Impossible de ne pas commencer par un petit apéro ! Fromage de chèvre, tomates cerises, céleri, olives ... à vous de varier les ingrédients et vos envies.


Salade Grecque


1.jpg

Fraîcheur et légèreté en perspective !


Tarte ricotta, chèvre avec des billes de melon


2.jpg

Les tartes sont aussi bonnes chaudes que froides, alors pas de quoi se priver !


3.jpg

Voici une nouvelle façon de présenter les concombres, un régal avec la sauce aux cacahuètes.


4.jpg

Rapides à réaliser, les quiches estivales sont idéales pour un apéritif, une entrée ou un plat.


Chicken Ceaser Salad


5.jpg

La salade César est un incontournable de l'été et on ne s'en lasse pas !


Bruschetta


6.jpg

Simple, croustillant et tellement frais. Un délice !


7.jpg

Les inconditionnels ne s'en lasseront pas ...


8.jpg

Riz gluant au lait de coco et à la mangue, une spécialité Thaïlandaise.


9.jpg

Un mélange rafraîchissant et délicieux. Des fraises, du chèvre, des feuilles d'épinard, quinoa, noix de pécan et avocat.


2.jpg

L'indémodable tarte au citron meringuée change de forme pour cet été ... mais le goût reste évidemment le même !


3.jpg

Faites vous plaisir et mettez en le nombre que vous voulez ! Le petit plus : accompagner les brochettes avec une sauce au chocolat...


4.jpg

Rien de mieux qu'un sorbet pour se faire plaisir sans remords.


5.jpg

Un délice pour les gourmand(e)s !


6.jpg

L'ananas sert de récipient pour accueillir les fruits !


7.jpg

Pas de scrupules à avoir avec ce dessert, fraîcheur garantie !


9.jpg

À vous de mettre vos parfums favoris et de mélanger les couleurs.


10.jpg

Une salade de fruits toute simple mais voilà, c'est juste ce qu'on demande durant les chaudes journées d'été.


Cheesecake fraises et pépites de chocolat


11.jpg

De temps en temps, il est bon de ne pas se priver et puis il y a quand même des fruits dans ce cheesecake! Une petite part suffit pour se régaler.


12.jpg

Kiwi et fraise pour rafraîchir votre été !


13.jpg

On craque sur cette tarte et son esthétisme !


четверг, 13 мая 2021 г.

thumbnail

Danish Pastry

Celebrate summer mornings with a delicious batch of cream cheese danish pastry! A beautiful addition to breakfast and brunch, they’re also perfect for tea time and as a small mid-day snack. These delightful puff pastry desserts are quick and easy to make at home in just 35 minutes. So pull out your apron and let’s get baking!


Fruit and Cream Cheese Danish Pastry

Cream Cheese Danish Pastry Ingredients


These are the simple ingredients for making fabulous cream cheese danish pastries: store-bought puff pastry sheets (or use my easy homemade puff pastry recipe), cream cheese, granulated sugar, sour cream, lime juice, lime zest, vanilla extract, fresh blueberries and strawberries, melted butter, and bakery-style sanding sugar.


How to Make Cream Cheese Danish Pastry Desserts


Here’s how to make puff pastry desserts, step by step. STEP ONE: Adjust your oven rack to the center position. Preheat your oven to 400 degrees. Place one thawed-out sheet of puff pastry on a lightly-floured surface and unfold it. STEP TWO: With a 4.5-inch biscuit cutter, cut out four rounds from the sheet of puff pastry. Within the large rounds, use a smaller biscuit cutter or drinking glass to score the dough.


Continued Instructions for Cream Cheese Danish Pastry


While baking in the oven, the scoring will encourage the puff pastry dough to lightly rise in a beautiful way around the fruit and cream cheese filling. Prick the center of the dough a few times with a fork. STEP THREE: Repeat this cutting-out process for the second sheet of puff pastry dough. Gather the dough scraps together, roll them out, and create two additional puff pastry circles. Place the rounds on baking sheets lined with parchment paper or silicone baking mats.


Continued Directions for Cream Cheese Danish Recipe


STEP FOUR: Add the cream cheese, sour cream, granulated sugar, lime zest, lime juice, and vanilla to the bowl of a stand mixer. Blend until all ingredients are incorporated, and the mixture is smooth and creamy. Place two tablespoons of the cream cheese mixture in the center of each dough round. With the back of a spoon, spread out the cream cheese leaving a 1/4-inch border.


More Step-by-Step Instructions for Cheese Danish


STEP FIVE: On half of the puff pastry desserts, place rinsed and dried blueberries over the cream cheese. Decoratively place halved strawberries (with stems removed) on the rest.


Brush melted butter along the rims of the pastry. Sprinkle the edges with sanding sugar. Bake for 15-16 minutes or until the rims of the puff pastry are lightly golden. Allow the cream cheese danish to cool on the cookie sheet before serving. If desired, garnish the middle of the strawberry breakfast pastries with additional lime zest.


How to Store Cream Cheese Danish Pastry


All baked goods containing cream cheese must be stored in the refrigerator. Do not leave your fruit and cream cheese danish pastry sitting out at room temperature for more than two hours. In the refrigerator they’ll stay nice and fresh for up to five days.


Kitchen Tools for Cheese Danish Recipe


These handy kitchen tools will make your breakfast pastries easy and fun to create! Do you have a KitchenAid stand mixer? There are so many beautiful colors to choose from. My husband just surprised me with a brand new one in a lovely summery ocean blue. I get a tropical vacation vibe just looking at it!


BREAKFAST PASTRY RECIPE > PIN IT TO PINTEREST


Save this easy delicious breakfast pastry recipe for later. Pin it to Pinterest!


More Easy Breakfast Recipes


If you love carrot cake, then you’ll absolutely love these moist and delicious CARROT CAKE SCONES. This breakfast recipe is a perfect addition to any brunch menu.


This quick and delicious BREAKFAST TOAST recipe is easy to make! This open-faced breakfast sandwich will bring visions of a room-service breakfast tray at an upscale boutique hotel.


This yummy, nutritious BAKED OATMEAL recipe will fill your tummy and tickle your taste buds. A great start to a busy morning!


This yummy iconic BLUEBERRY MUFFIN RECIPE is guaranteed to make you smile! They’re so darn delicious. Whenever I make them, I double the recipe. Perfect for breakfast, brunch, tea time or dessert.


CREAM CHEESE DANISH PASTRY > JOIN THE CONVERSATION!


Do you love quick and easy breakfast recipes? What do you think about this 35-minute recipe for cream cheese danish pastry? I invite you to join the conversation in the comments below!


вторник, 11 мая 2021 г.

thumbnail

Crock Pot Pecan Praline Dip Recipe

One of the things I love about making so many recipes in the Crock Pot is you really can make a little bit of everything in them. This Crock Pot Praline Dip recipe is a delicious slow cooker dessert.


Crock Pot Pecan Praline Dip Recipe


When I first started using our crockpot I realized that I didn't have to stick with just meat-based recipes. I always thought the slow cooker was just for pulled pork or making soups.


Over the past few years, I have really been trying to expand all of the things we make with our Crock-Pot and share it with everyone. It is such a versatile tool in our kitchen. So much so that I recently counted and I had 6 crockpots.


I ended up giving a couple away since that was a few too many for storing but don't worry I still have 4 of them. There are times during the year that I will have all 4 going and wish for more of them.


I love using them during the holidays to keep food warm and not have to fight for oven space.


Do you have a favorite dish to make in the crockpot? I would love to hear about it!


This Crock Pot Praline Dip recipe is the perfect dessert dip. Great for family dinner or a party. Trust me everyone will love this delicious slow cooker crockpot recipe!


Crock Pot Praline Dip Ingredients


  • Brown sugar
  • Ground cinnamon
  • Sweetened condensed milk
  • Unsalted butter
  • Light corn syrup
  • Mini marshmallows
  • Chopped pecans

Serve with apples, bananas, pound cake for dipping


Great Crockpot Dip Recipes


If you are prepping for a party or love dips check out these other great crockpot dips!


Reuben Dip


I love how versatile the slow cooker is and how easy it is to prep for parties.


Do you love recipes? Check out our copy cat recipes, dessert recipes, and our Crock Pot Recipes.


Recipe originally shared on January 5, 2017. Updated October 2020.


пятница, 7 мая 2021 г.

thumbnail

Creative and Yummy Donuts

If you’ve been around this blog for a while now, you may have realized I have an obsession with cute baked goods. I’m especially excited about this post though, because donuts are my favourite food ever! Well… maybe favourite dessert ever. I love a good pizza too.


Anyways, I wanted to share some of the really cute donuts I have found on Pinterest, and share the love. If you’re interested in any of these donuts, have a click through to the page they came from and give them some love!


I’m seriously so impressed at the quality of decorating these donuts have been through, and I hope you enjoy this post on donuts as much as I do!


Creative and Yummy Donuts


Get some donut recipe ideas with this collection of donuts for motivation. Try your hand at homemade baked or fried donuts. This collection of donut photography will inspire you to create your own yummy treats (or maybe buy from someone if your baking skills are lacking). Beautifully glazed donuts!

Get some donut recipe ideas with this collection of donuts for motivation. Try your hand at homemade baked or fried donuts. This collection of donut photography will inspire you to create your own yummy treats (or maybe buy from someone if your baking skills are lacking). Beautifully glazed donuts!

Get some donut recipe ideas with this collection of donuts for motivation. Try your hand at homemade baked or fried donuts. This collection of donut photography will inspire you to create your own yummy treats (or maybe buy from someone if your baking skills are lacking). Beautifully glazed donuts!

Get some donut recipe ideas with this collection of donuts for motivation. Try your hand at homemade baked or fried donuts. This collection of donut photography will inspire you to create your own yummy treats (or maybe buy from someone if your baking skills are lacking). Beautifully glazed donuts!

Get some donut recipe ideas with this collection of donuts for motivation. Try your hand at homemade baked or fried donuts. This collection of donut photography will inspire you to create your own yummy treats (or maybe buy from someone if your baking skills are lacking). Beautifully glazed donuts!

четверг, 6 мая 2021 г.

thumbnail

Creamy Nutella Popsicles

creamy nutella popsicles featured

It’s pretty much summer and that can only mean one thing: popsicles! Popsicles are so refreshing after a hot day and they’re SO easy to make. I recently bought this new popsicle mold (a more traditional shape than my rocket ship popsicle mold and wanted to test it out.


Instead of making a fruit juice based pop, I combined COOL WHIP whipped topping and Nutella to make a creamy, rich popsicle that’s perfect for a light dessert. All you have to do is give the ingredients a quick trip to your blender, pour into a mold and just like magic you’ll have an incredible snack or dessert to cool you down.


This is a sponsored conversation written by me on behalf of COOL WHIP. The opinions and text are all mine.


вторник, 4 мая 2021 г.

thumbnail

COZY AUTUMN WILD RICE SOUP

This Cozy Autumn Wild Rice Soup is wonderfully creamy and comforting. See tips above for how to modify this recipe to be gluten-free and/or vegan, if you prefer.


This Cozy Autumn Wild Rice Soup is wonderfully creamy and comforting.  See tips above for how to modify this recipe to be gluten-free and/or vegan, if you prefer.
This Cozy Autumn Wild Rice Soup is wonderfully creamy and comforting. See tips above for how to modify this recipe to be gluten-free and/or vegan, if you prefer.

INGREDIENTS:


  • 6 cups vegetable stock (or chicken stock)
  • 1 cup uncooked wild rice*
  • 8 ounces baby bella mushrooms, sliced
  • 4 cloves garlic, minced
  • 2 medium carrots, diced
  • 2 ribs celery, diced
  • 1 large (about 1 pound) sweet potato, peeled and diced
  • 1 small white onion, peeled and diced
  • 1 bay leaf
  • 1 1/2 tablespoon Old Bay seasoning
  • 3 tablespoons butter
  • 1/4 cup all-purpose flour
  • 1 1/2 cups milk
  • 2 large handfuls of kale, roughly chopped with thick stems removed
  • Kosher salt and freshly-cracked black pepper

DIRECTIONS:

INSTANT POT (PRESSURE COOKER) METHOD:


  • Combine vegetable stock, wild rice, mushrooms, garlic, carrots, celery, sweet potato, onion, bay leaf and Old Bay seasoning in the bowl of an Instant Pot pressure cooker. Stir briefly to combine.
  • Cover and set vent to “sealing”. Cook on manual (high pressure) for 25 minutes. Let the Instant Pot rest there for an extra 10 minutes (natural release). Then carefully turn the vent to “venting” and release the remaining pressure (quick release). Remove lid and discard the bay leaf.
  • Meanwhile, during those final 10 minutes of pressure cooking, prepare your cream sauce on the stove. In a medium saucepan, cook the butter over medium-high heat until melted. Whisk in the flour until combined, and cook for 1 minute. Gradually add in the milk, and whisk until combined. Continue cooking, stirring frequently, until the mixture nearly comes to a simmer and has thickened. (It should be very thick.)
  • Add the cream sauce and kale to the soup, and stir gently until combined. Taste and season with salt and pepper (plus any extra Old Bay seasoning, if you would like) as needed.
  • Serve warm. Or transfer to sealed container(s) and refrigerate for up to 4 days.

CROCK-POT (SLOW COOKER) METHOD:


  • Combine vegetable stock, wild rice, mushrooms, garlic, carrots, celery, sweet potato, onion, bay leaf and Old Bay seasoning in the bowl of a large slow cooker. Stir briefly to combine.
  • Cook on high for 4 hours or on low for 8 hours, until the rice is cooked and tender.
  • Meanwhile, during those final 10 minutes of slow cooking, prepare your cream sauce on the stove. In a medium saucepan, cook the butter over medium-high heat until melted. Whisk in the flour until combined, and cook for 1 minute. Gradually add in the milk, and whisk until combined. Continue cooking, stirring frequently, until the mixture nearly comes to a simmer and has thickened. (It should be very thick.)
  • Add the cream sauce and kale to the soup, and stir gently until combined. Taste and season with salt and pepper (plus any extra Old Bay seasoning, if you would like) as needed.
  • Serve warm. Or transfer to sealed container(s) and refrigerate for up to 4 days.

STOVETOP METHOD:


  • Heat (an extra) 1 tablespoon butter in a large stockpot over medium-high heat. Add onion and sauté for 5 minutes, stirring occasionally, until soft and translucent. Stir in the garlic and cook for an additional 1-2 minutes, stirring occasionally, until fragrant.
  • Add in the vegetable stock, wild rice, mushrooms, carrots, celery, sweet potato, bay leaf and Old Bay seasoning. Stir to combine.
  • Continue cooking until the soup reaches a simmer. Then reduce heat to medium-low, cover and simmer for 45 minutes, or until the rice is tender, stirring occasionally.
  • Meanwhile, during those final 10 minutes, prepare your cream sauce in a separate saucepan on the stove. In it, cook the butter over medium-high heat until melted. Whisk in the flour until combined, and cook for 1 minute. Gradually add in the milk, and whisk until combined. Continue cooking, stirring frequently, until the mixture nearly comes to a simmer and has thickened. (It should be very thick.)
  • Add the cream sauce and kale to the soup, and stir gently until combined. Taste and season with salt and pepper (plus any extra Old Bay seasoning, if you would like) as needed.
  • Serve warm. Or transfer to sealed container(s) and refrigerate for up to 4 days.

thumbnail

Cookie Dough Dip

It's basically everything you love in cookie dough—brown sugar, vanilla, chocolate chips—mixed with cream cheese and a little butter for an addictive dessert dip.


  1. In a large bowl using a hand mixer, beat cream cheese and butter until fluffy. Beat in both sugars until no lumps remain, then beat in vanilla.
  2. Season with salt and fold in mini chocolate chips until combined.
  3. Serve with pretzel chips.

Cookie Dough Dip vertical — Delish.com

This content is imported from {embed-name}. You may be able to find the same content in another format, or you may be able to find more information, at their web site.


This content is created and maintained by a third party, and imported onto this page to help users provide their email addresses. You may be able to find more information about this and similar content at piano.io


About

Поиск по этому блогу

Технологии Blogger.